


Haunted House Tutorial | Free Printable
This shop has been compensated by Collective Bias, Inc. and its advertiser. All opinions are mine alone. #HandsOnCrafty #CollectiveBias
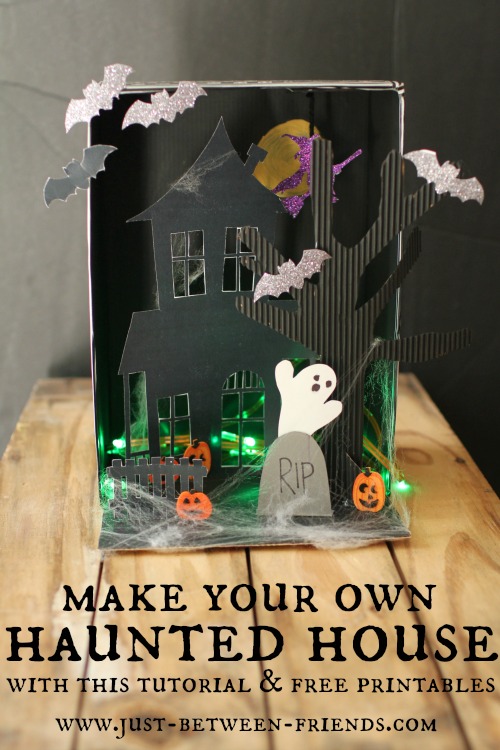
If you don’t already know of my love of Halloween, let me just tell you, I LOVE IT! The weather, the costumes, the decorations, the food, and the projects; it is all my very favorite. My oldest daughter came home from school the other day telling me that she wanted to make a haunted house. The wheels in my head got spinning, and we came up with such a fun Haunted House scene that I thought I would share the tutorial with free printables with you so that you can make one on your own.

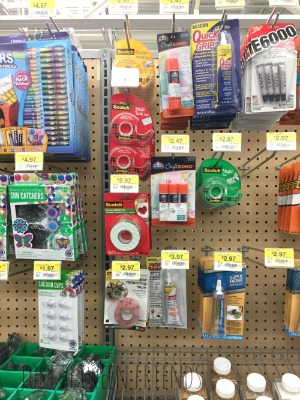
One of my favorite parts of this whole scene is the addition of the different textures and glitters. I love glitter, but I hate the mess, so when I found the Scotch® Expressions Tapes at Walmart, I was thrilled with the possibilities. you can get the glitter look without ANY of the mess. I grabbed some of the Halloween colors, as well as some Scotch® Create Double-sided Tape and the Scotch® Expressions Washi Black Stripe tape from Walmart and got to work.
(It is a little tricky to find the Scotch® brand craft tape if you don’t know what you’re looking for. Head back to the craft section at Walmart, and you’ll find the tape nestled in with the other adhesives. The Scotch® Expressions Multi Glitter Tape and washi tape is found below this section. Just thought I would pass it along!)
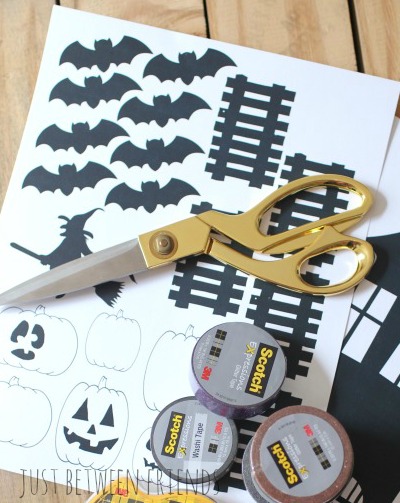
I designed a basic Haunted House silhouette, as well as some Halloween shapes that I thought would be fun to use along with the house. If you would like to use any of these, you’re welcome to print them out using the links at the end of this post.
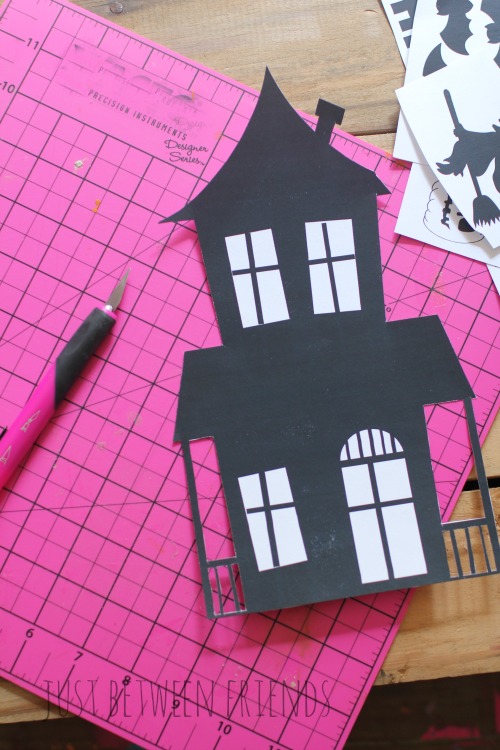
I started by cutting out the house. The outside edge is simple enough to cut with scissors, but to cut the little details out, I found that using an xacto knife really made it a lot easier. For the bigger parts, though, it was just as good to use scissors.
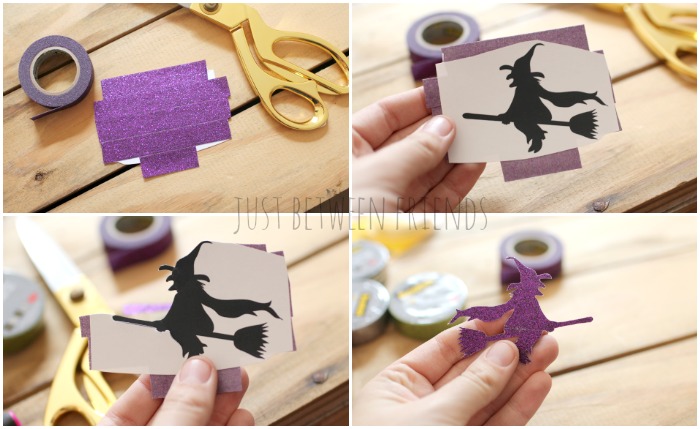
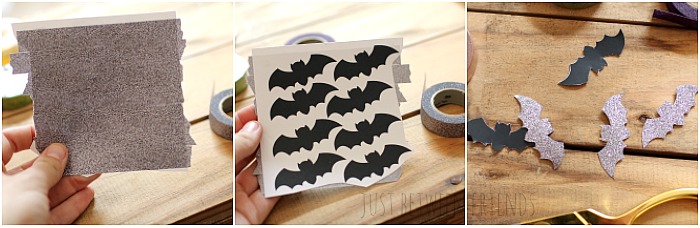
Next, I cut out the different shapes into blocks before cutting them out individually, and then applied the glitter tape to the back of the paper so that the shapes were still visible on the other side. For the witch, I went with purple, and the bats were platinum.
I needed a place to put the Haunted House scene, so I used a snack box that I had in my pantry. I cut off the front of the box and then used part of that to hang out the front to add a little more space to decorate. After I had the box cut out, I painted the inside of the box with a black acrylic paint. Once that was dry, I added a yellow full moon in the corner.
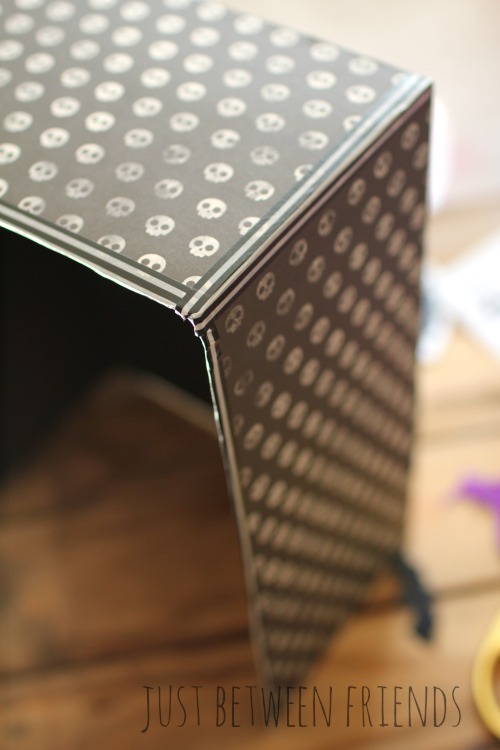
The sides looked a little funny having the original box showing, so I grabbed some skeleton Halloween patterned paper and the Scotch® Create Double-sided Tape to decorate the sides. You simply apply the tape to the box and then add the paper. After I had the paper attached, I cut the paper to size. It made it super simple! The edges were finished off using some of the Scotch® Expressions Washi Black Stripe tape.
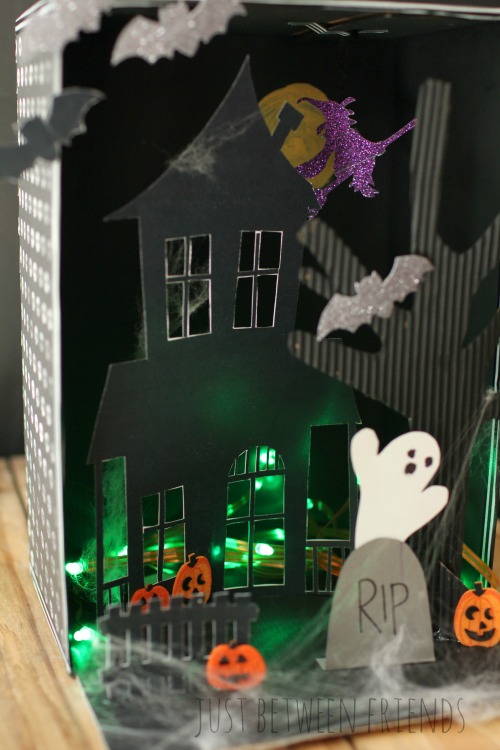
Now for the fun part! Putting it all together! I started with the house. I wanted to make sure that it was exactly where I wanted it before I had too many other things taking over. I found the best way to get it to stand up was to attach a wooden craft stick to the back of the haunted house with the Scotch® Create Double-sided Tape. Then I glued it into place on the bottom of the box.
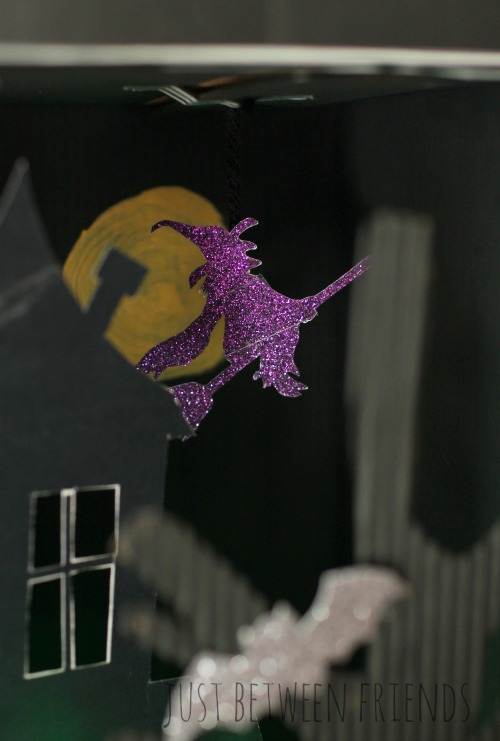
The witch went up next. I used some black yarn to hang it from the top of the box. I thought it would be spooky to have her flying over the moon. After the witch, I cut out a tree shape using corrugated paper. The bats came next and I attached the bats using the Scotch® Create Mounting Squares.
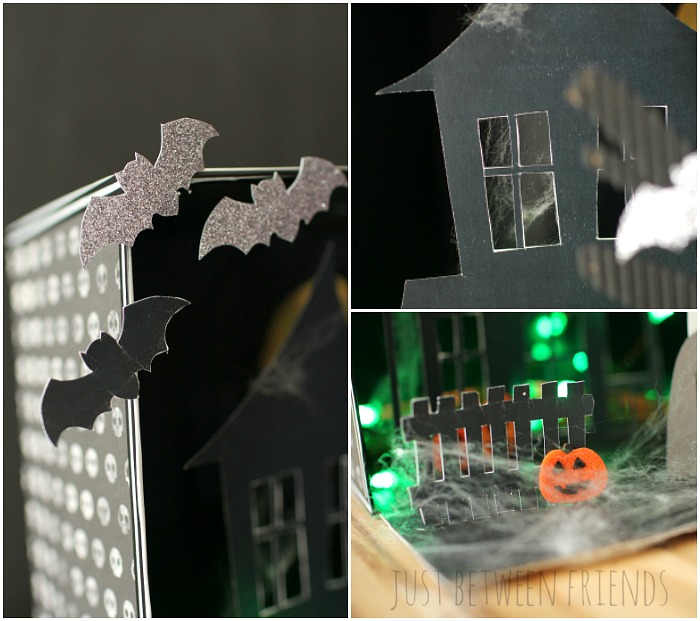
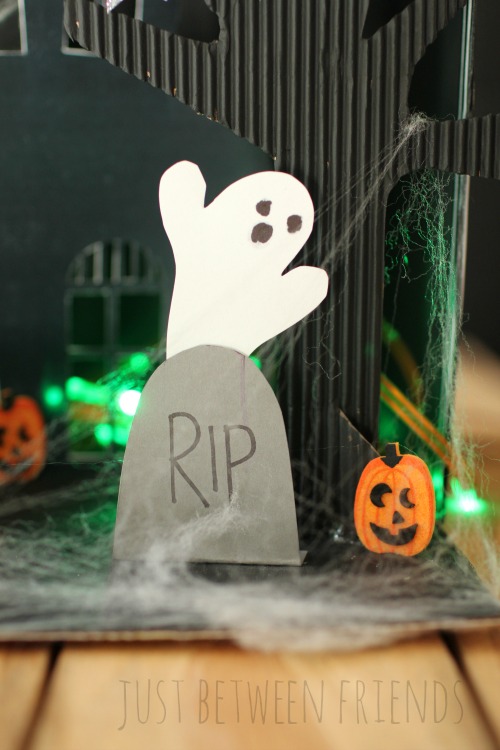
Last, it was all about the little details. Felt pumpkins, headstone, fence, spider webs, and even a ghost coming out of the grave. But the very best part is probably the green led lights that light it up and give it a spooky ghoulish glow. When my kids saw the glowing lights, they were mesmerized! My son kept saying ” WOW!” and my girls loved how spooky it looked.
I have to tell you a quick story. I worked on this with my oldest, Lillie. When we were finished, she stayed in my craft room for another hour creating another haunted house scene on her own after we had already worked on it for two hours. I can’t tell you how much she loved this project! It is probably a little too hard for anyone under 6 or 7, but anyone older than that would really love to give it a try.

If you are wanting even more SPOOKY inspiration, you need to check out some of these other Scotch® posts. So many fun ones to choose from!
Printables are for personal use and available to subscribers of Just Between Friends only. To use this printable, please SUBSCRIBE NOW.
Once you have subscribed, click the links below to download the printable:
