


DIY Hello Sign
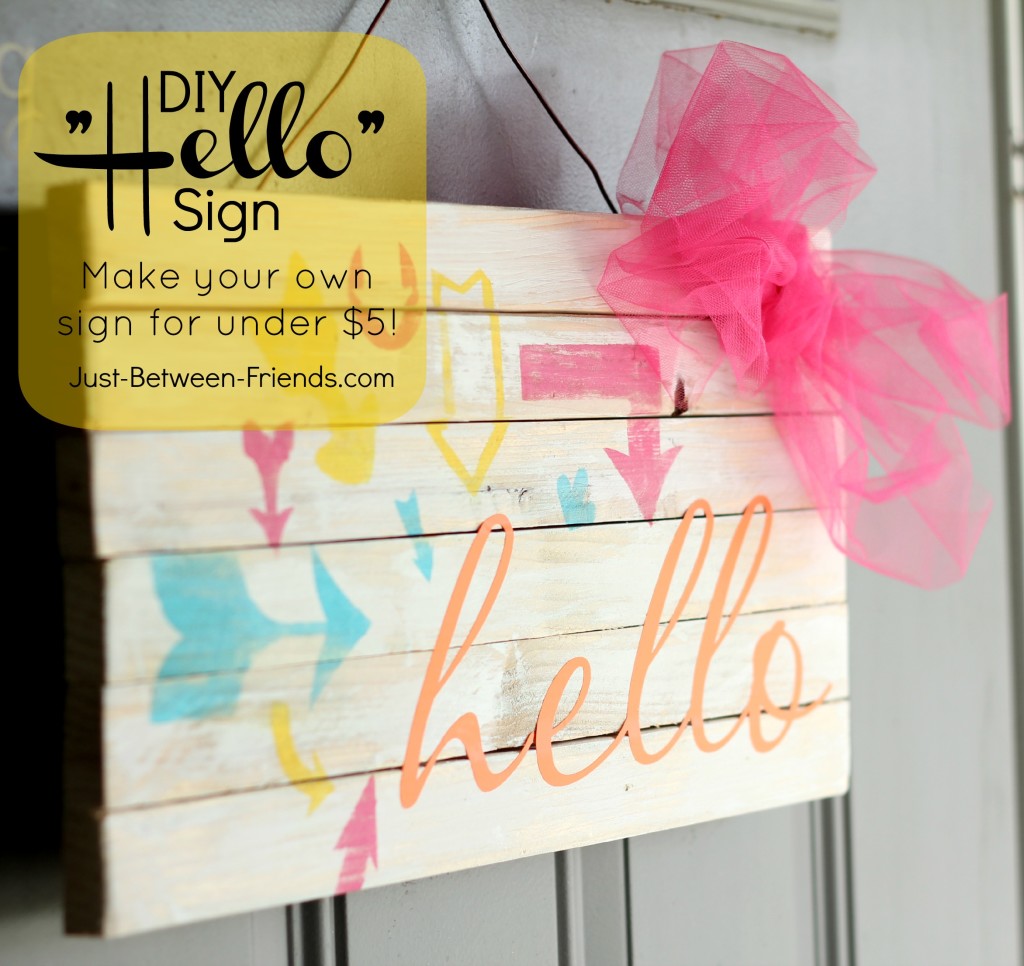

My front door has been seriously lacking any sort of curb appeal for quite a while now. I figured I should remedy that and got to work making it welcoming and bright. I don’t think anyone could come to my door and not feel welcomed by something so fun and colorful. What do you think? Would you put one on your door? Let me show you how I made this DIY hello sign for under $5. WHAT?!?! Yep, you heard me. UNDER $5! Let’s get to work.
First you will need to purchase this fun “hello” vinyl from Fab Decor. It is available in so many fun colors and it’s only $1! I chose the orange because it was so bright and perfect for my front door.
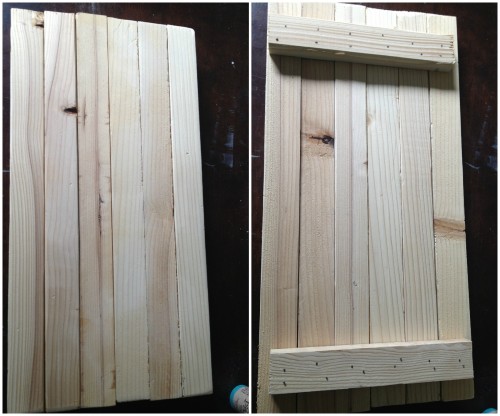
Next, you will need to get (2) 1X2X8 pieces of wood from Home Depot or Lowes. They usually are only $2 or so. Have them cut you (6) 18 inch pieces (or you can cut it yourself) and you will also need 2 pieces of wood that are about 10 inches long. Lay the 18 inch pieces of wood down next to each other and then place the 10 inch pieces on top of them. Nail them into place making sure that you use nails on each piece.
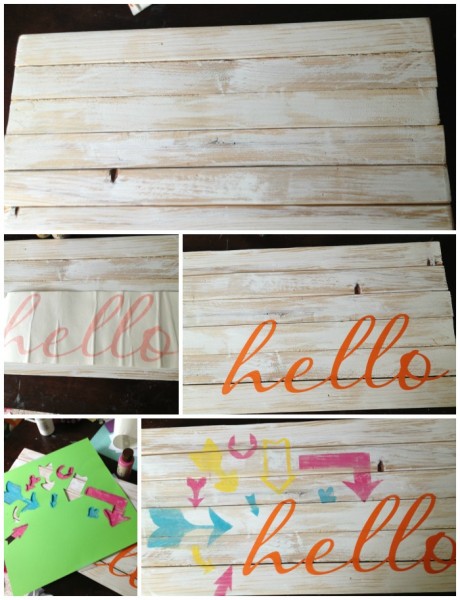
Your base sign is now ready. I sanded the edges a little bit before painting it, but then I took some white paint and just did a white washed coat of paint on the wood allowing the wood to still be seen in some places. The way to do this is to make sure that you don’t have too much paint in your paint brush and just dry brush it onto the wood. I added the vinyl to the board first so that I could see exactly where I would put the arrows, then I cut out a stencil with a bunch of cute arrows using my silhouette machine. (You could also just trace arrow shapes onto the wood and then paint them in.) I cut them out using cardstock and just made sure to use minimal paint around the edges so that it didn’t bleed underneath. After the paint was dry, I sanded it down just a little bit so that it had a little bit of a worn out look to it.
Last, I added a quick bow using tulle. All I did was bunch up a big piece of tulle and then wrapped the middle with a smaller piece to make it look like a bow. It is simple but effective. To attach it to the board, I just used hot glue.
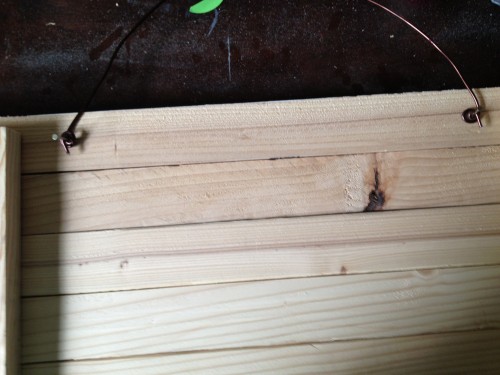
To hang it on the door, I nailed two nails in the back of the board and then wrapped wire around each piece leaving it long enough that it hung where I wanted it to.
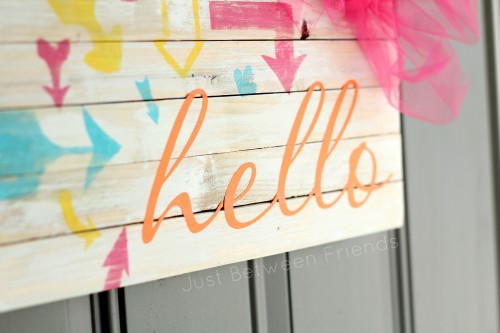
Ta-da! What do you think? I am SO happy with the way it turned out. Even if you don’t make the sign just like mine, you should get the cute “hello” vinyl and do SOMETHING with it. I think it is darling and would look great on anyone’s door. With a price like $1, you can’t really go wrong.


I love this sign. I’ve been doing a little DIYing this weekend too. I put up a few decals around the house. I hope you and the family have had a great weekend! If you get a chance please stop by to say hi?
Leslie
http://www.TheCraftySideOfSarcasm.com
Love it!
Cute! Love the bright colors of the arrows.
xoxo
So so cute!
Very great post. I simply stumbled upon your weblog and wished to say
that I’ve really loved browsing your blog posts. In any case I’ll be subscribing
to your rss feed and I am hoping you write once more soon!