


Farmhouse Sign Tutorial

A few years ago, I was feeling the winter blues particularly strongly. I told my husband that I needed a day to try and pull myself out of my funk, have fun, and hang out with a friend of mine without having to worry about kids or my responsibilities at home. My friend got on board, and we decided we wanted to go to an antiques sale, and take pictures of cows. (I know, we are so weird. There is a point to this story, I promise.) My grandfather, “Papa” lives in the country near several dairy farms. After taking pictures at the dairy, we had been talking about the barnwood signs we had seen for sale at the antiques shop, and I mentioned that my Papa had a pile of wood in his barnyard. We stopped by and each grabbed one piece of wood that we liked (thanks Papa!) and headed home. That piece of wood has been sitting in my shed since then, waiting to be made into the perfect sign.

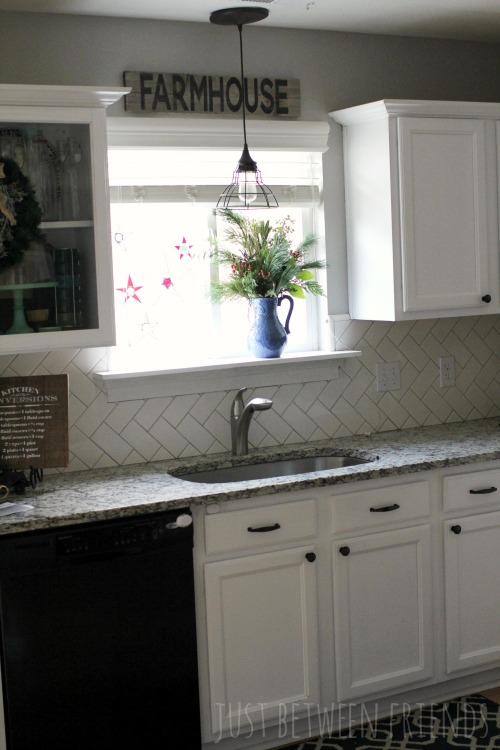
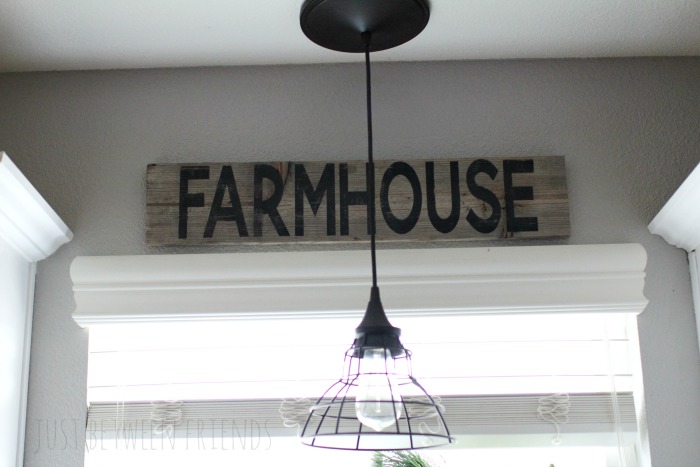
I wanted to make it into something that would always remind me of my grandparent’s farm, and I wanted it in a place I would see often. It is a simple 1X6 piece of pine that has been sitting in the elements which created the best aged grey color. The farmhouse style has become one of my most favorite ever, and I knew a farmhouse sign to go in my farmhouse kitchen was the way to go.
If you’ve been on Pinterest in the last year, you probably have seen this style of sign before. A lot of the ones that I love are white with black writing, but I really wanted the grey to stay. I decided to go with black lettering on my grey board, and I really love the way it turned out. I can’t help but smile every time I look at it as well.
To get started, I pulled out my Cricut Expressions Air 2 machine and got to work. I knew the dimensions of my sign, and used the Blooming Elegant Sans font to create the lettering for it. Using Design Space for this project made it easy to manipulate the font to be exactly the way I wanted it to be. The letters were too short and wide, plus they were spaced too far apart. I changed all of those things with a simple click and then cut it out using vinyl that I was using as a stencil.
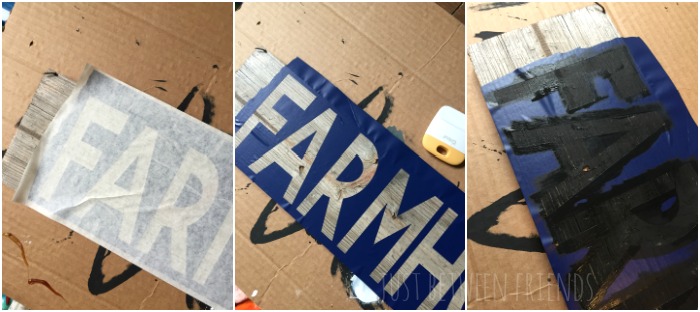
Using a black and grey mixed paint so that the lettering would be more of a charcoal color, I used a foam brush to paint the lettering onto the sign. As a general rule, it is better to dab the paint onto the sign instead of swiping while using vinyl. You’ll have less chances of it bleeding under the vinyl and you’ll have a nice clean line.
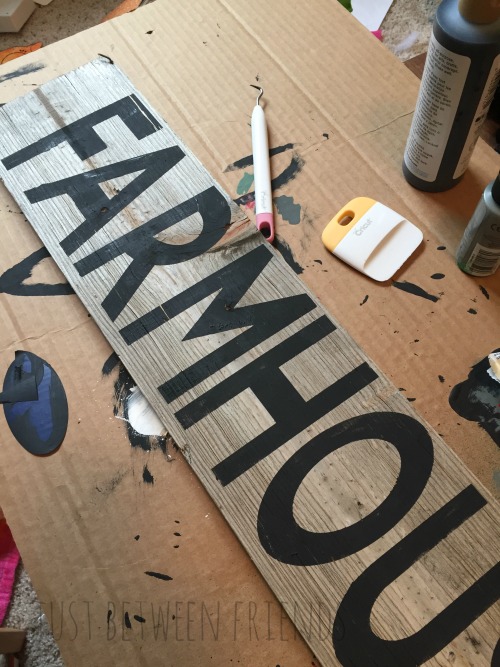
After the paint is applied, pull the vinyl off and admire your clean lines on your lettering (cause you followed my advice up above…right? Right.) I always pull the vinyl off while the paint is still a little bit wet. I have found that the dry paint will pull off with the vinyl if you leave it too long. To make it easier on yourself, grab your Cricut weeding tool out, or you can use a straight pin.
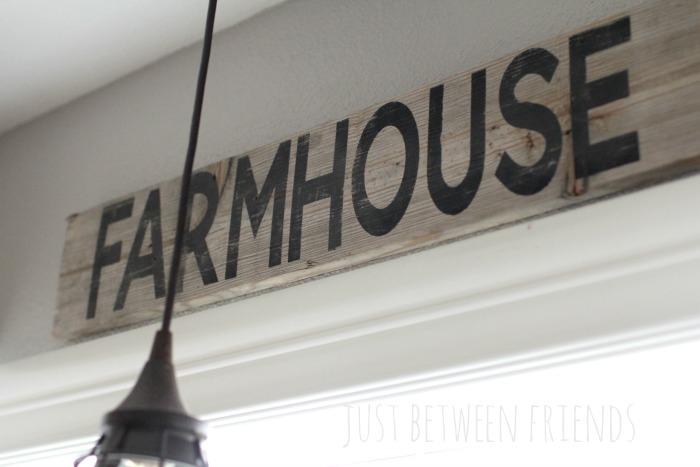
Now that they vinyl is off and your paint is dry, grab some sand paper and rough that baby up. I love having it look worn and having the wood show through the letters in some places. Once you’ve got it sanded to your liking, you’re done! Hang it up and admire your handiwork.
Every time I am in my kitchen, I see the sign and think of my grandparents. I brings an instant smile to my face, and it almost makes doing dishes bearable. Almost.
This is a sponsored conversation written by me on behalf of Cricut. The opinions and text are all mine.
