Head Wrap Tutorial
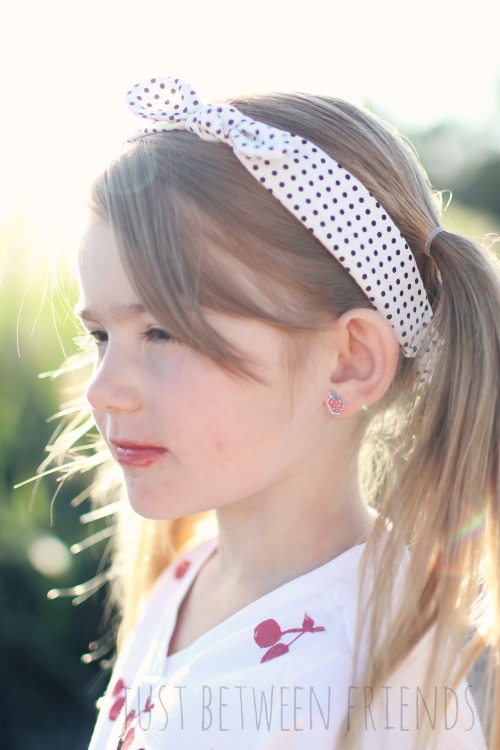
I have a really fun post for you today! I was asked to post as part of the summer series going on over on The Idea Room, and I decided to make it a two part post with a cute shirt and head wrap duo that is perfect for wearing through the summer. You can read all about how to make a darling cherry shirt over on The Idea Room, but stay right here for the head wrap tutorial. It is super simple and just requires some basic sewing skills.
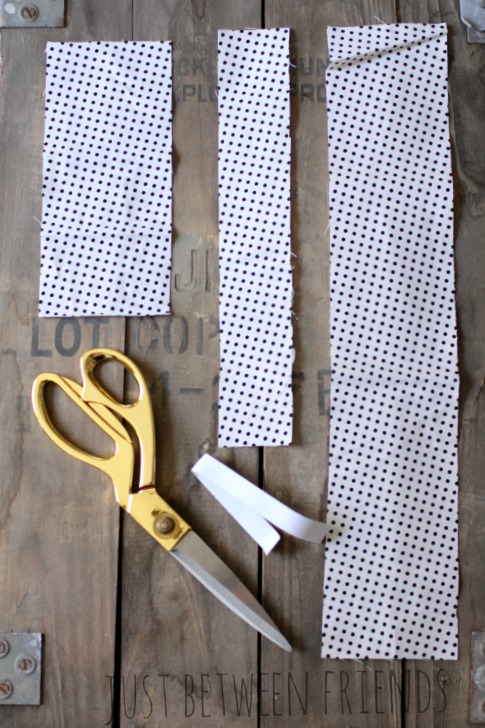
To get started, you’ll need some cute fabric, sewing machine, 3/4 inch wide elastic, a safety pin, and some scissors. Start by cutting your fabric. You’ll need 3 pieces, the first will be 7.5″X3″. Second you’ll need one that is 17″X3″, and the last piece will be 11″X2″. Your elastic will need to be cut to 7.5″.
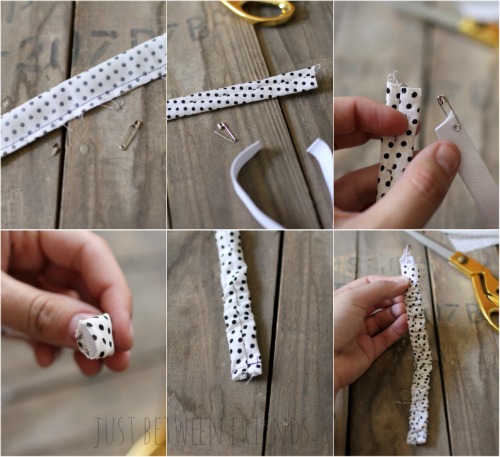
Once you have them cut, grab the 11 inch piece and sew it in half with right sides together. Then, flip it right side out and, using the safety pin, thread the elastic through the middle. Once the elastic is inside, sew the end of the fabric to the end of the elastic so that it stays put. Since the elastic isn’t as long as the fabric, the fabric will bunch up over the top of the elastic, and that is exactly what it is supposed to look like. Take the safety pin out of the elastic and sew the other end of the fabric and elastic together.
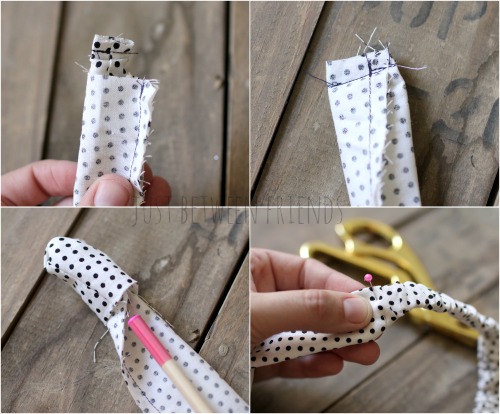
Then you will grab the other piece of fabric and sew it in half just like you did the previous piece. take the elastic and put it into the middle of the fabric you just sewed in half. Make sure that the seam is in the middle of the elastic and then sew across the one side. After it is sewn shut, flip the elastic through the other side and make it right side out. I like to use the end of a pencil to help me flip it right side out. You’ll want to attach the elastic to the un-sewn side now. Fold in the fabric and place the elastic inside. Pin it into place and then sew straight across. The basic headband will be completed now, but I wanted to add a cut little knot to the top.
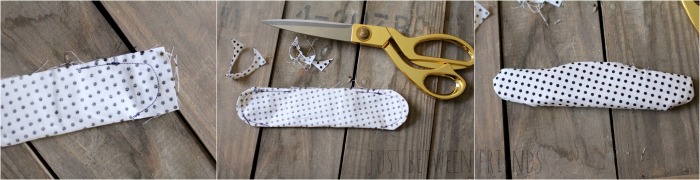
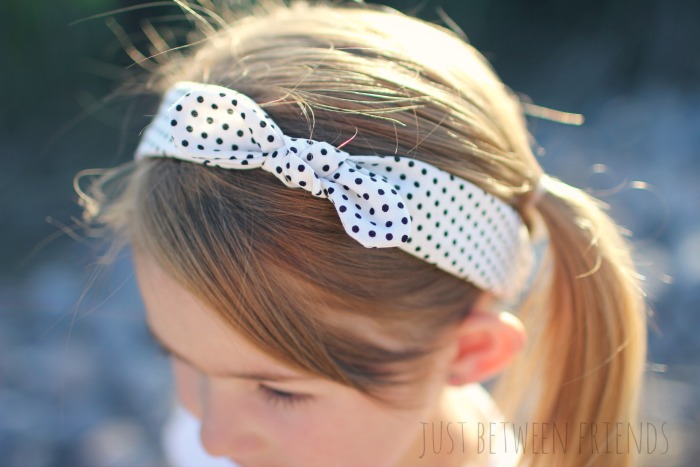
To create the knot, you will need the 7.5″ piece of fabric and you will fold it in half. Instead of sewing a straight line down one side, we want a rounded edge, so you will sew a half circle on each end of the fabric leaving the seam open in the middle. Once you have that, flip the piece right side out and make sure the edges are nice and round. Fold the open seam into the middle and then sew a straight line either by hand or using the machine to close it up.
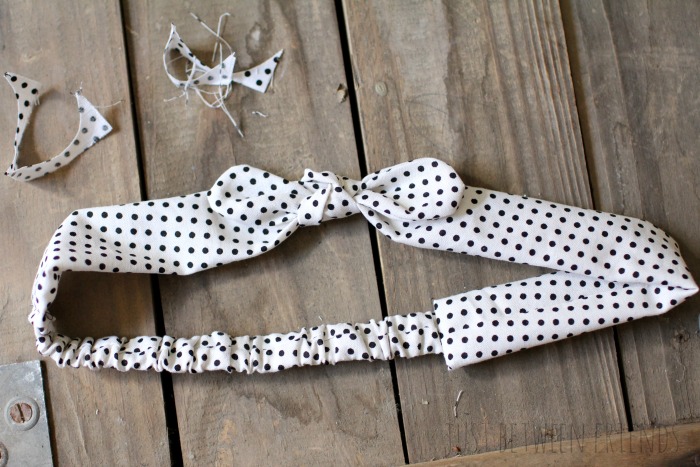
Last, just tie it in a simple knot around the headband anywhere along the top that you would like. I like to have mine just slightly off centered, but the sky is the limit and you can put it anywhere you want.

I love the way it turned out and especially love it with the sweet hello cherry shirt I made. And of course, Addie was hamming it up during pictures which makes this all the more adorable. If you love this head wrap tutorial, you can also find a bunch of hair tutorials for little girls that you can use it with, or even more hair accessory posts that are sure to inspire you!