


DIY Floating Shelf | Giveaway

I really think you’re going to like today’s post. Not only do I have a really amazing shelf tutorial to share with you, but I’ve partnered up with Black & Decker for a giveaway for some tools to help you make this shelf!!! I know. It’s awesome. The giveaway will be at the end of this post, but first, I want to show you how to make a DIY floating shelf on your own. The best part? All it takes is 10 minutes and 10 dollars to make your very own. I am not even lying guys. It’s so easy and inexpensive to create this floating shelf!
Start by heading to The Home Depot. Did you know that they sell barnwood there now? It was life changing when I first found it. I bought an 8 ft long 1X4 piece of the wood and I didn’t even know what I was going to do with it. I just knew that I needed it so I grabbed it. The idea to make shelves for my front room came to me and I knew I needed to make them with the barnwood. It’s just so pretty!
Grab your barnwood (they have 3 different color options available right now) and you’ll also need a 1X2 piece of pine, some 2.5 inch screws, 3 1 inch screws, your 20V MAX* Lithium Cordless Drill, a saw to cut the wood with, and either a nail gun or some nails to assemble the shelf with.
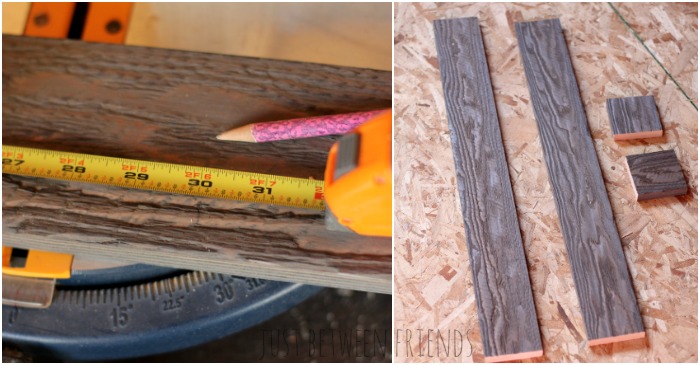
Here’s your cut list:
- 30″ piece of barnwood 1X4
- 28.5″ barnwood 1X4
- (2) 3.5″ barnwood 1X4
- 20″ pine 1X2
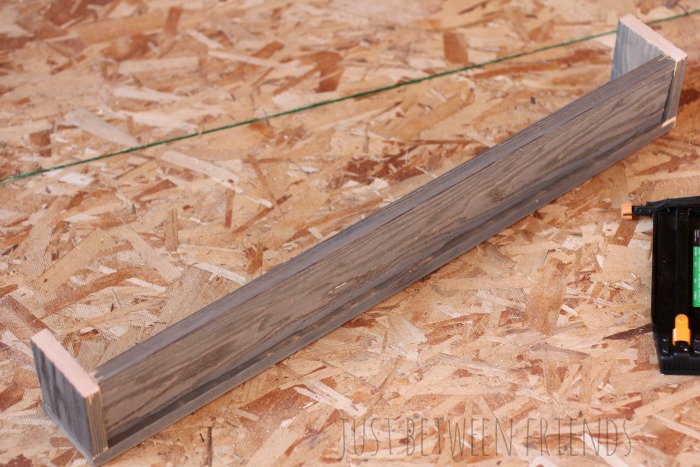
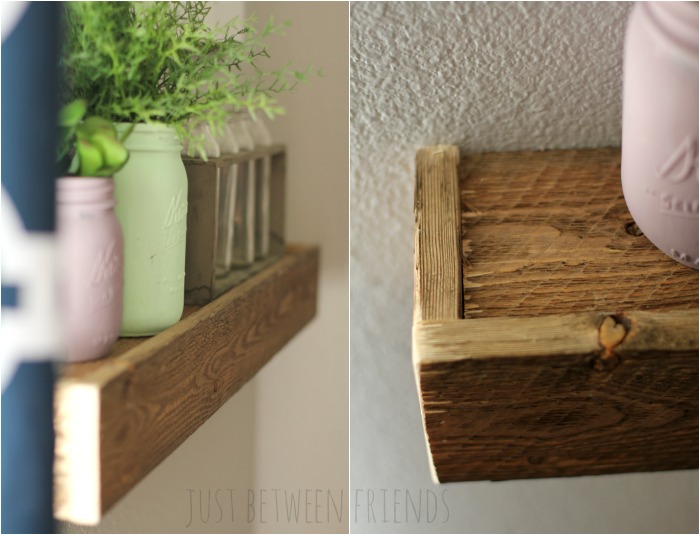
Now that you have your wood cut, use either nails and a hammer or a brad nail gun to attach the 3.5″ pieces to the front 30″ piece. Make sure that you are joining them so that the longer piece is in front of the shorter pieces.

After you get the sides attached, turn the shelf so that the front of the shelf is face down. This makes putting the top of the shelf on evenly a breeze. The 28.5″ piece of barnwood should fit between the side pieces perfectly. You’ll want to leave about 1/4″ from the top of the front and sides to where the top piece goes so that when the shelf is hung up, there is a ledge to keep things from falling off. Nail that into place by nailing through both of the sides as well as a couple of nails through the front of the shelf into the top piece.
This is where it gets really fun! You’ll get your 20″ piece of pine, a stud finder, and a level, and decided where you want the shelf on the wall. Studs are placed every 16″, so with the 20″ piece, you’ll have plenty of wiggle room to put the shelf where you want it to go. Screw through two studs making sure that it is level and use your 2.5″ screws so that it will be nice and sturdy. (If you can’t quite get the second stud to work because of where you want the shelf on the wall, you can always use a wall anchor on one side.)
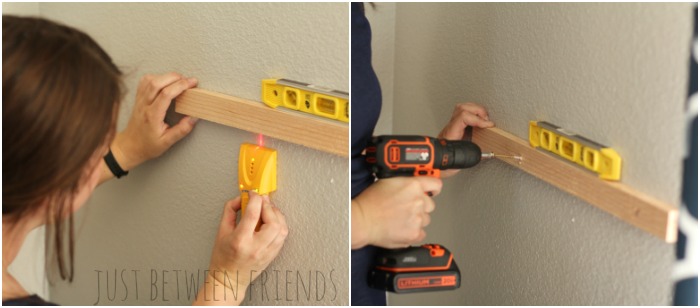
Once the pine is in place, hold your shelf in place and make sure that it is level and in the place you want it on the wall.
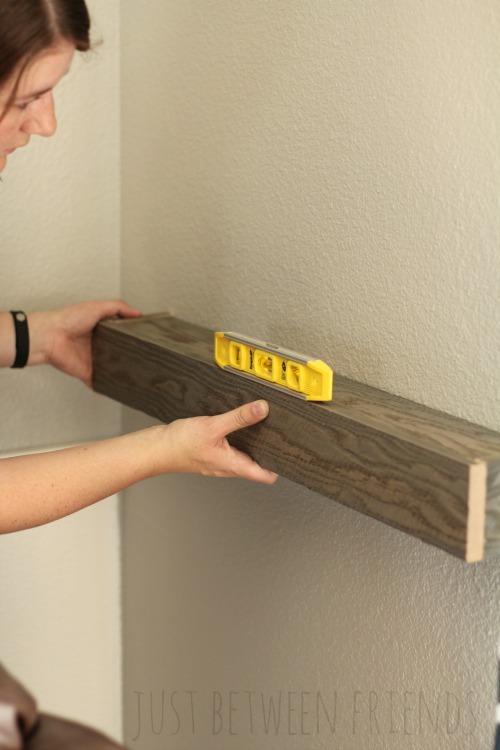
Use three screws and your Black & Decker 20V MAX* Lithium Cordless Drill to get your shelf attached to the wall. It is totally lightweight and easy to use, plus you don’t have to deal with cords. You can put the screws in anywhere that the 20″ piece of pine is underneath the shelf. Because of the fact that it is securely screwed into the studs, it will hold your shelf without a problem.
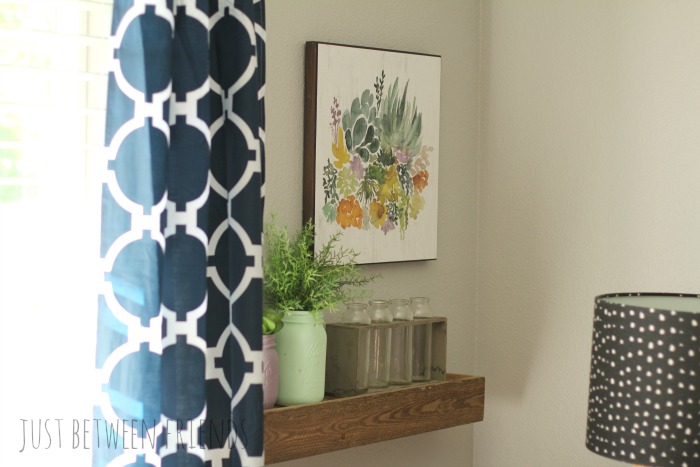
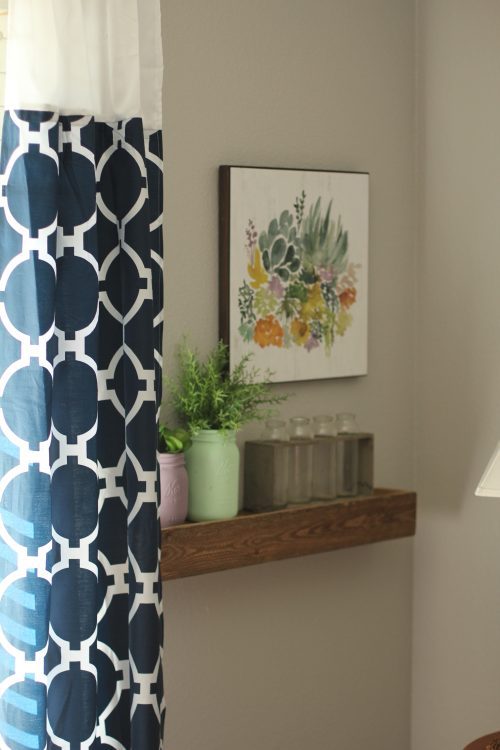
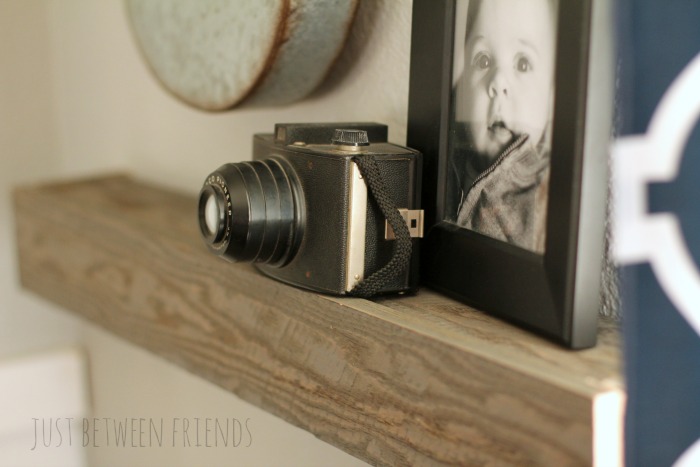
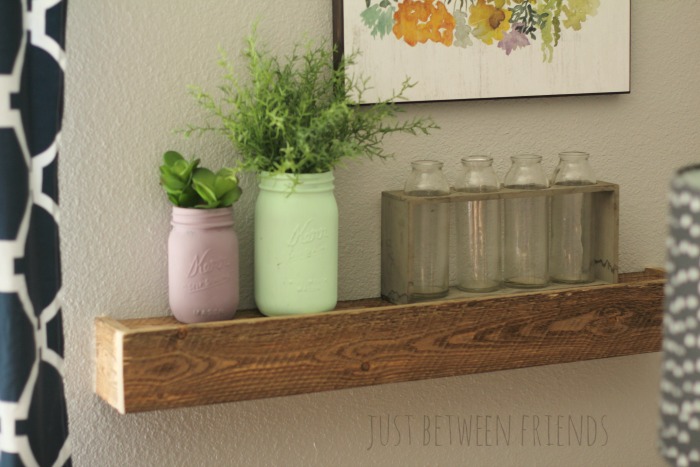
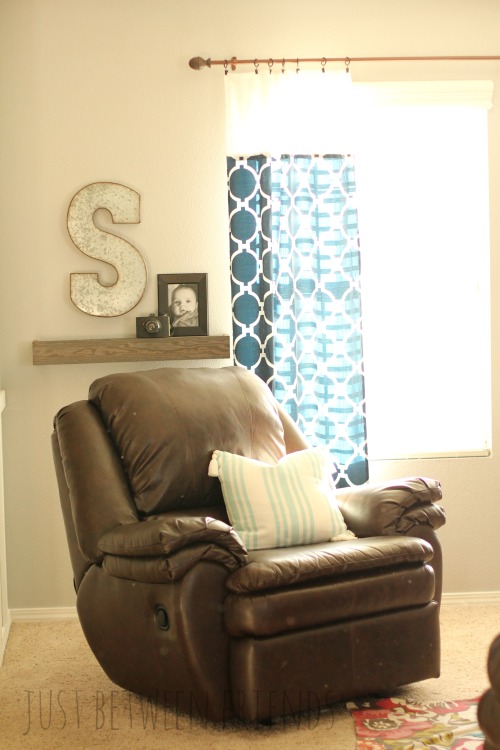
Ta-da! I know it probably sounds like a lot, but I literally spent 10 minutes building the shelf and am patting myself on the back for the way it turned out. Having the floating shelves on either side of my front room window just makes me smile when I walk down the stairs and see them.
By way of future planning, I have a really fun idea for lighting up above the shelves that I am hoping will happen soon-ish. When it does, I’ll be sure to show you!
You’re all probably dying to know about the giveaway now, right?! One lucky winner is going to win a 20V MAX* Lithium Cordless Drill and 20V MAX* Circular Saw. I am going to keep this super simple. All you have to do to enter is to go check out this link and look at the Ideas & Inspiration tab at all of the projects you can do if you were to win the drill and saw. After you’ve check that out, come back here and leave a comment below telling me which project you would tackle first if you won. That’s it!
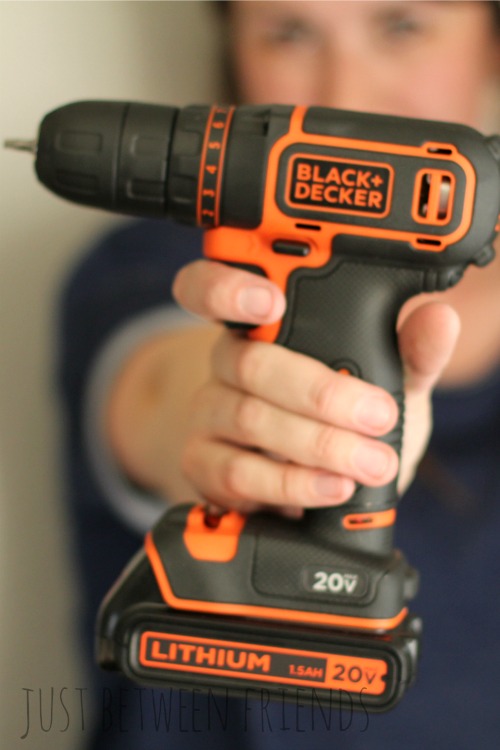
The giveaway will run from now until July 3. The winner will be emailed on July 4th and will have 24 hours to respond and claim their prize. A new winner will be picked if the prize isn’t claimed within 24 hours. Good luck, and check out the video below to learn more about the drill you’re gonna win 😉

I’d make the charging station 🙂
I’ve been looking into better shoe storage right now… but we’re making plans for a bunk bed… and I’d like to do your shelves too… too many options
I’d love to make your cute floating shelf or the diy chalkboard menu board. So cute!
I would build the sofa table first and then so much more!!!
I’d probably build the adirondack chair… We always seem to need more seating options outside! Thank you!
Id love to make that address marker plant box, it’s so lovely!
The entryway organizer! But I really want to make these floating shelves!!
Oh the closet cabinets looks dreamy!!!! I think most closets are basic but NEED drawers and builts ins!!! Love how your shelf turned out! We have many projects to tackle in our new house!
I really liked the under the bed rolling storage. our new house has hard floors in a lot of the rooms and I hate when random stuff slides under the bed. I do also want to make a floating shelf in our half bath. it has a pedastal sink and the soap always falls off! floating shelf would be the perfect solution!
I’d like to make a toy chest for the playroom and have my kids decorate and paint it.
We’d make nesting boxes for our chicken coop.
But out of the ideas shown, I guess I’d do the kitchen spice rack.
I repair the fence around the house,put some shelves for storage in the basement,and house lay want a gazebo,would do that too.
I’d love to build a bedframe with a rustic headboard!
Love the barnwood look!
I’d like to a diy entryway thing they have shown with hooks and a space to put everything when you walk in!
Love the shelf! I’d love to try making the Address Marker Plant Box! Thanks for the chance.
I want to make shoe storage to put by the front door!
I would add some shelves to our pantry.
I want to make a new outdoor picnic table with my husband. Our old one broke and we need a new one because that is what we like to do is get all the family outdoors around the picnic table. Thanks for a chance to win!!
jewelwood55(at)gmail(dot)com
I like the address sign/planter box.
Oh I love your floating shelf! That is so cute! Love the initial! I think the first thing I would make is the Hammock stand! That looks so nice and comfortable! I also would love to make a raised garden bed! I container garden now, but the vegetables would love some extra room to grow.
I would tackle first, shelves in the garage. I need more storage and desperately need to get a lot of stuff off the floor of the garage, so shelves against one of the walls, at least, will come i handy. Thanks for the chance to win 🙂
jslbrown2009 at aol dot com
I love your shelf. I would love to make several of the kitchen spice racks I saw on the black and Decker site.
I would make this fantastic address marker plant box!
http://www.blackanddecker.com/en-US/ideas-and-inspiration/projects/diy-address-marker-plant-box
I want to make an entryway cabinet for organization. debg510u (at) gmail.com