


Fruit Coin Purse
I was at Target the other day, and I happened upon the cutest fruit shaped lip gloss ever. I couldn’t resist purchasing it because I knew my girls would love it, but I also wanted it because it got the wheels spinning in my head of all the different things I could make that were shaped like fruits. The one idea I was most excited about? What if I were to make a little fruit coin purse for my girls? I immediately started sketching out some ideas of how I could make this happen, and I ended up with two ideas that I am so dang excited about!!
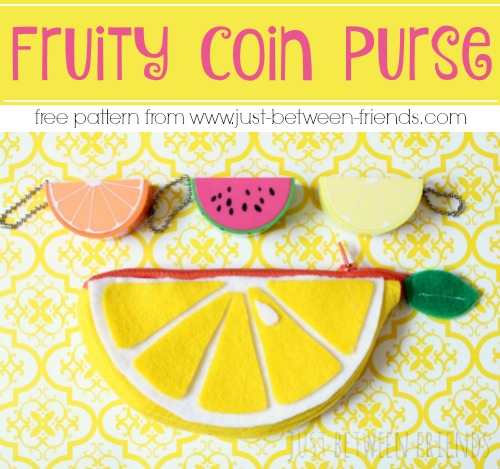
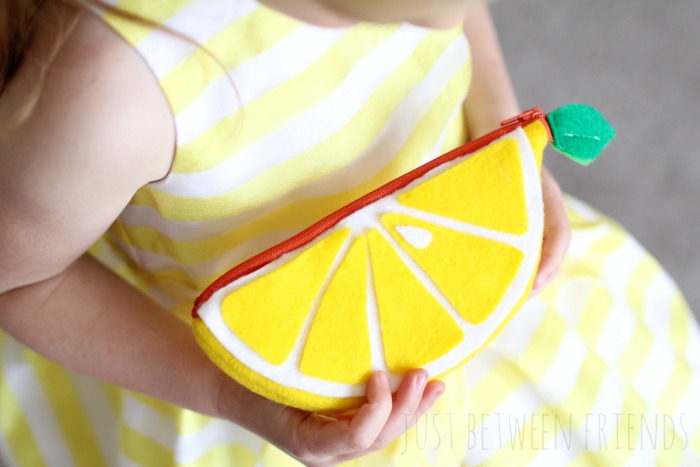
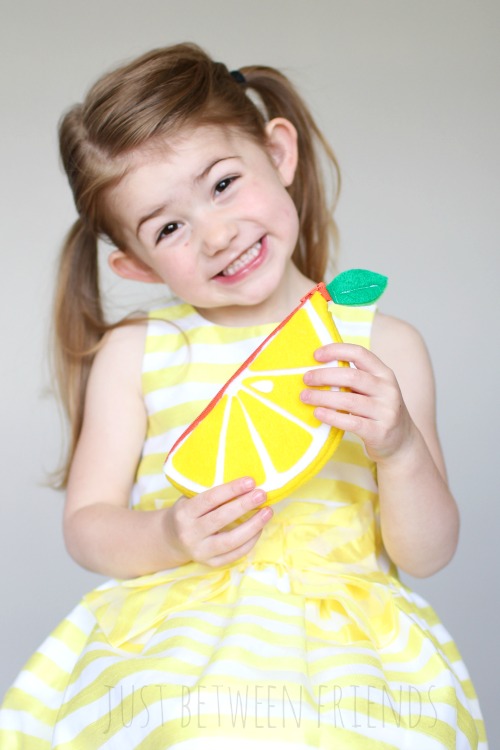
The first is this lemon slice coin purse. The only thing that could possibly better than a fruit coin purse is the fact that this one cost me less than $4 to make!!!! I know! It just keeps getting better and better!! I know you’re anxious to make one of your own, so let’s get right to the tutorial.
You’ll want to buy:
- craft felt in yellow and white
- fabric glue (I used this Fabri-tac glue)
- 7 inch zipper in a coordinating color
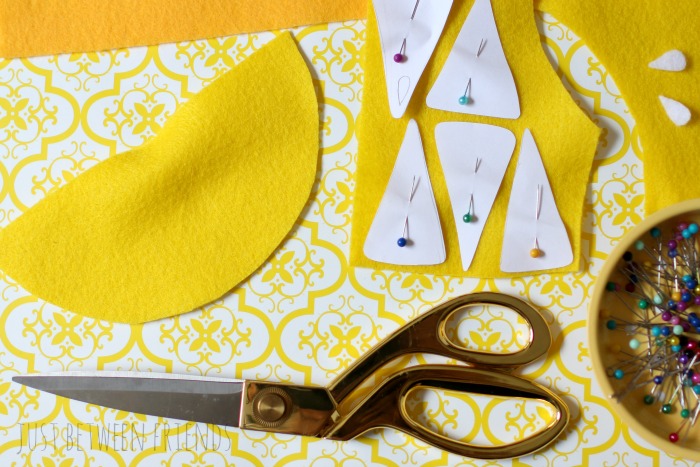
Start by downloading the free pattern at the end of this post. Then you’ll want to cut out all of the pieces. For the lemon slice, here’s what you’ll need to know.
- A- cut 2 out of yellow
- B- cut one out of white
- C- cut one out of yellow
- D- cut all five shapes out of yellow
- E- cut one out of white
(Don’t worry about the F for this coin purse. It will be used in the next fruit purse I will be sharing on Monday.) 😉
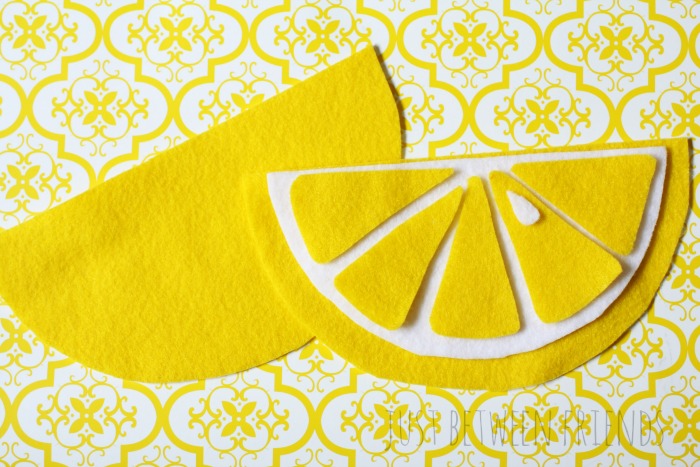
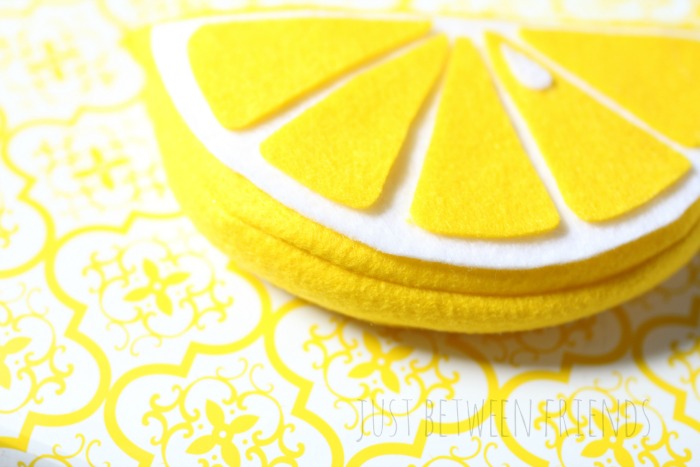
Once you have everything cut out, you are going to glue the pieces of the lemon together starting with the little white seed, then move on to the yellow slices, and after those are all attached, glue the white to the yellow (A) piece. Make sure not to put the white all the way to the top of the yellow slice so that when you sew it all together, you will still see the white.
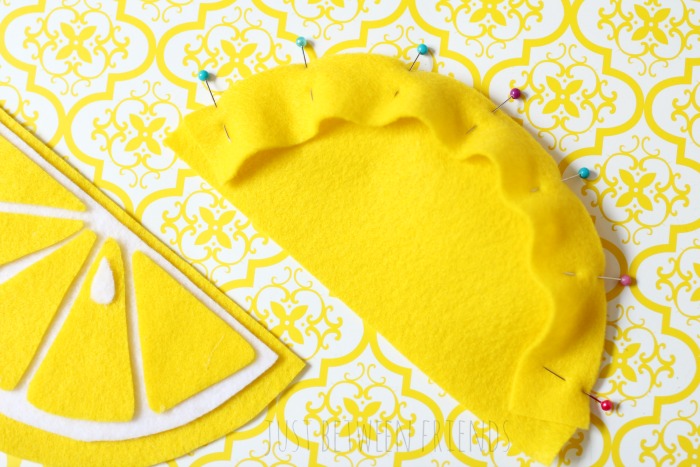
Next, you’ll pin (C) to the second (A) piece, and sew it together with a 1/4 inch seam allowance.
After that is connected, pin the first (A) piece that has the lemon slice on it to the other side of part (C) and sew it together with the same 1/4 inch seam allowance.
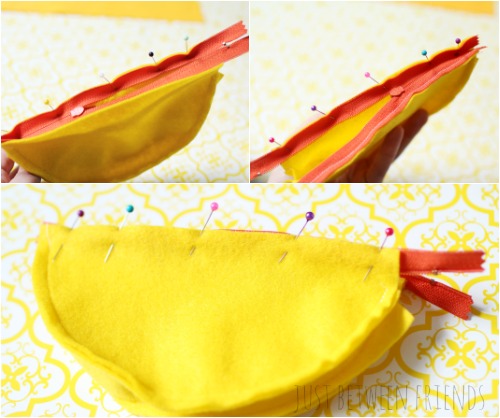
Now you’ll want to sew the zipper into place. Unzip the zipper before you start, and then, with the purse flipped inside out, pin the zipper to the top with the zipper facing inside the purse. Pin and then sew one side at a time. The back of the zipper needs to be sewn into the bag, so after you sew along the sides of the purse, go back to the side and sew across the zipper and the bag together to hold the zipper in place as well as create a box corner.
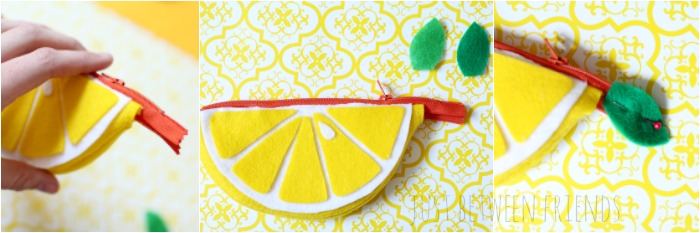
Last, you can do the same for the other side of the zipper, or, you can try something that I think adds to the cuteness factor. I left the zipper out of the bag, and then I cut a leaf shape out of two colors of green felt and then sewed it onto the end of the zipper. I love the way it looks!
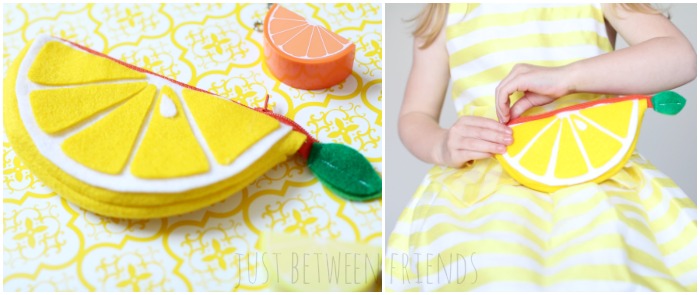
That’s it! I know it might sound a little overwhelming, but it is totally doable and such a fun bag to have for you or your kids. My girls love the bags I made for them! Let me know if you have any questions about any of it, and I will be happy to help.
Printables are for personal use and available to subscribers of Just Between Friends only. To use this printable, please SUBSCRIBE NOW.
Once you have subscribed, click the link below to download the pattern:
Fruit Slice Coin Purse Pattern

One thought on “Fruit Coin Purse”