


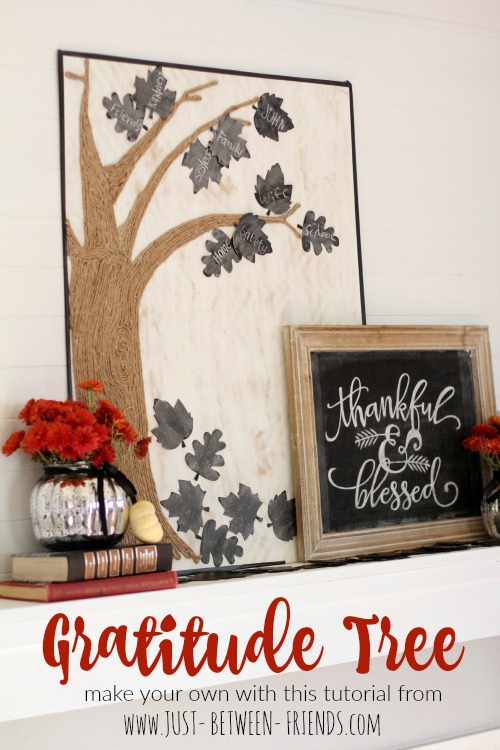
Gratitude Tree
About two weeks ago, I was in a car accident with my two youngest children and our car was totaled. We are so incredibly blessed that we were able to walk away from the accident unharmed. I have some whiplash and soreness from hitting the airbag and seat belt, but it could have been so much worse, and my children were completely protected. I tell you this because it has caused me to think a lot about how fleeting and fragile life really is, and I have felt a deeper gratitude for everything that I am blessed with. I wanted a way that my family and I could have a visual reminder of the blessings that we have, especially throughout the holiday season. This gratitude tree has become the perfect way for my family to remember that we really have so much.
To make one for yourself, it is really SO easy! If you know how to use a paint brush and a hot glue gun, you can totally do this. You’ll need:
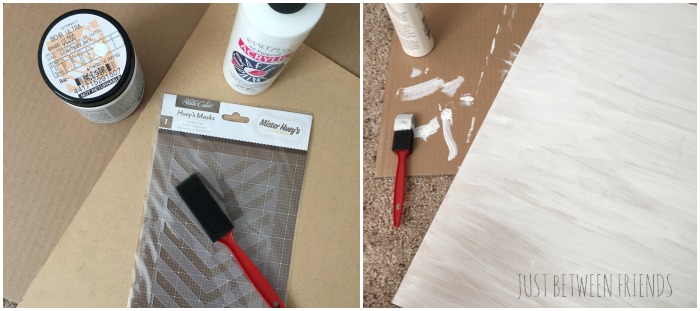
- 1/4″ MDF cut to be 2 ft by 3 ft.
- White paint
- Jute string (I used a full spool that had 75 ft of jute)
- Hot Glue Gun
- Sea Foam paint and a stencil with a pattern of your choice (optional)
- Chalkboard paint (I bought Krylon chalkboard spray paint)
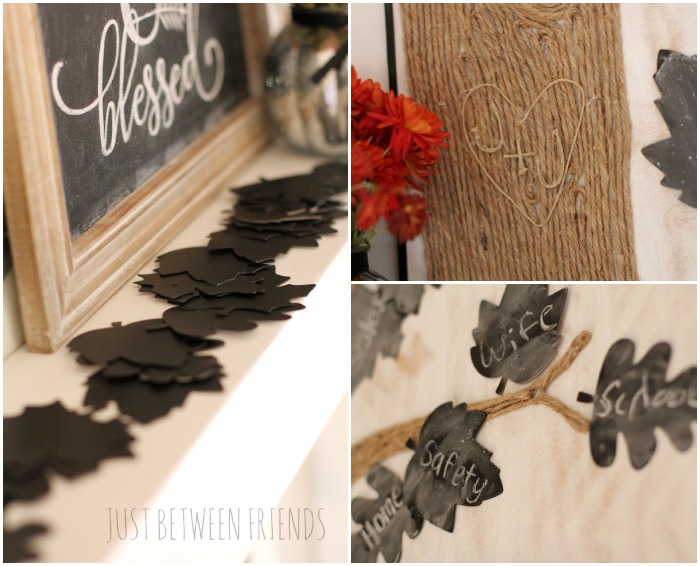
- Die Cut leaves (You can also use wooden leaf cutouts like these ones, but mine were chipboard and 80% off from Michaels in their fall clearance area)
Start by painting your board white. Then lightly stencil your pattern on the board. This part is optional, I just wanted to do it because I like the texture and interest it adds to the overall design. Once everything is painted and dried, sand it down so that the brown will show through as well. I loved the rustic look of it!
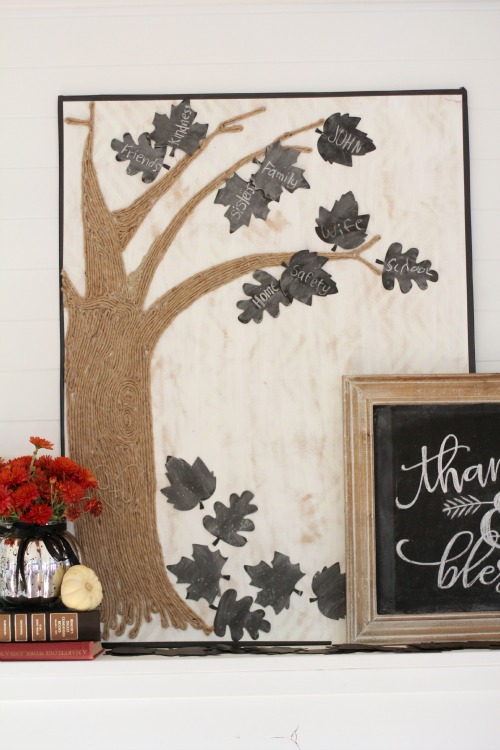
After the board was ready, I used a pencil to draw a rough outline of a tree and branches. Using hot glue, I attached the twine to the board filling in where I had drawn. To add interest to the tree, try adding in knots in the tree, turn and go a different direction throughout the trunk and branches, and be sure to add little branches to the end of the big branches. I also thought it would be fun to add a little heart and J + J to the trunk, and I love the way it finishes things off.
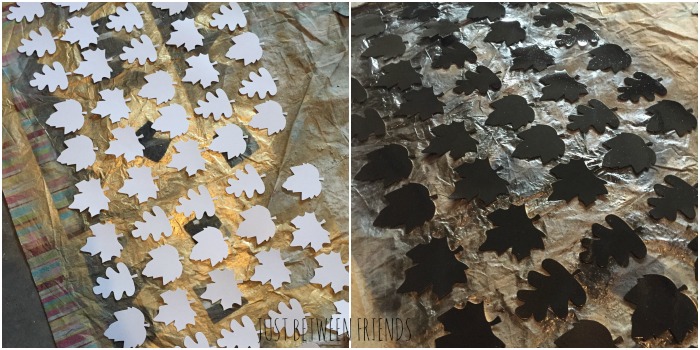
Next, I took the leaf cutouts I bought at Michaels and spray painted them with the chalkboard paint. When I decided to make a gratitude tree, I wanted to make it reusable so that I could use it every year without having to redo everything. Before writing on the leaf with the chalk, prep it by rubbing the chalk all over the leaf and then wipe it off. Your surface is ready for you to write on after that.
I thought I was finished at that point, but when I got it up on my mantel, I knew it was missing something. The white blended into my fireplace and I needed a way to frame it out, but it needed to be simple. Lucky for me, I had some black scotch tape that I used to create a thin border all the way around the board. It was the perfect way to frame it out because it was fast, easy, and inexpensive!
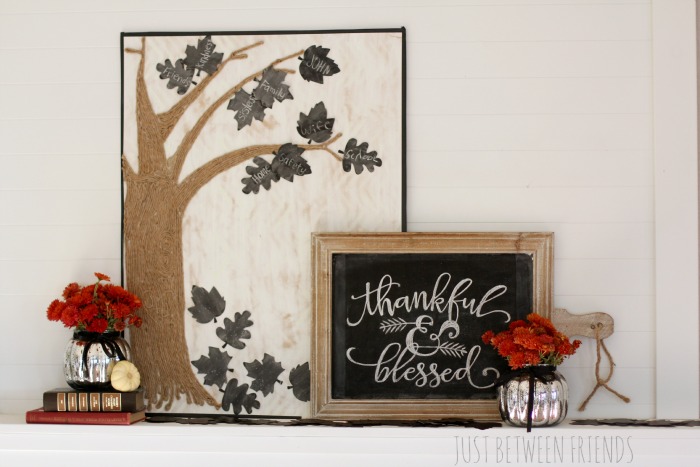
I am in love with the way that it looks. We have been adding to the board as we think of things that we are grateful for, and I love that my kids come to me with things that they want to make sure to write down. you should definitely make one of these for your own home, but if not this, than something similar. Looking for the blessings and remembering what we are thankful for has changed the dynamic in my home into something I am thankful for. 🙂
