


DIY Wood Crate | Flourish & Blotts

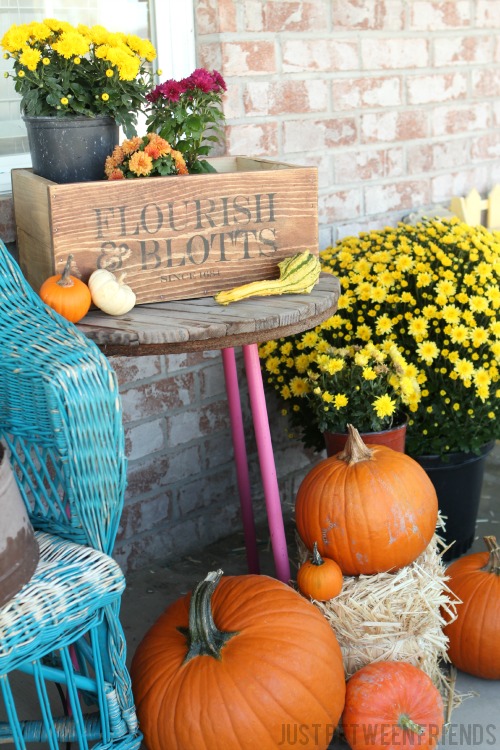
The other day I told my husband that there were specific things that needed to be done before this baby could come. One of those was that I NEEDED my porch to look like fall. I know, it’s totally irrational, but I know that if it doesn’t get done before he is here it will never get done. Anyway, I got to work last week and decided I needed a wooden crate to hold some flowers. This DIY wood crate is the perfect addition to any porch because it isn’t holiday specific. I may have actually started having contractions 6 minutes apart because of this project, but it was TOTALLY worth it! (I have since been banned from using power tools by my dr. Oops. 🙁 )
This project was made entirely of scrap wood that I had in my garage making it totally free! I used a 1X8 and 1X4 piece of wood to put this all together. The 1X8 are the front and back as well as one piece in the bottom of the crate. The 1X4 was used everywhere else.
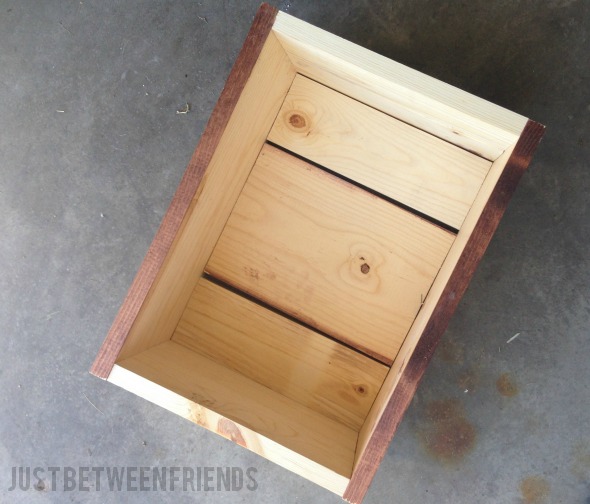
I used my chop saw to cut the wood to size, and then used a staple gun to put the pieces together. If you make a crate like this, remember to leave spaces between the wood in the bottom, or drill holes for drainage purposes. It will help to keep your wood from warping. After it was put together, I used a stain on the wood. The 1X8 turned a darker color than the 1X4 and I LOVE the contrast of the dark and light wood together.
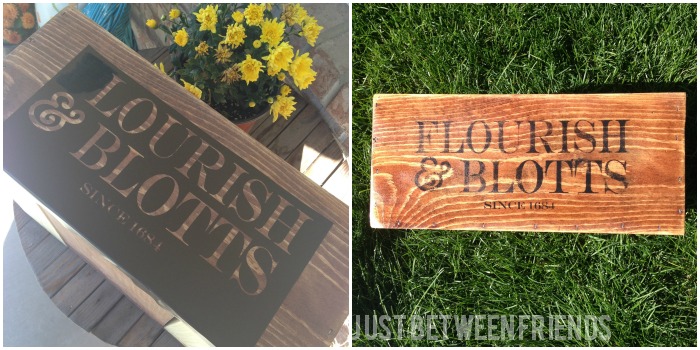
To finish off the crate, I wanted to stencil something on the front of it to make it look like shipping crate of some kind. Here is where you will get bonus points if you know where Flourish & Blotts comes from without me telling you. If you don’t already know, it is from Harry Potter and is the name of the bookstore. I really liked the name and I also liked the idea of using the name for the crate so that it is kind of Halloween-ish but not glaringly in-your-face Halloween so that I can use it whenever I want. I used my Cricut Explore to cut out some vinyl and stenciled it onto the box using acrylic paint. After the lettering dried, I sanded it a little bit and then sprayed it with a clear coat to make it resistant to water.
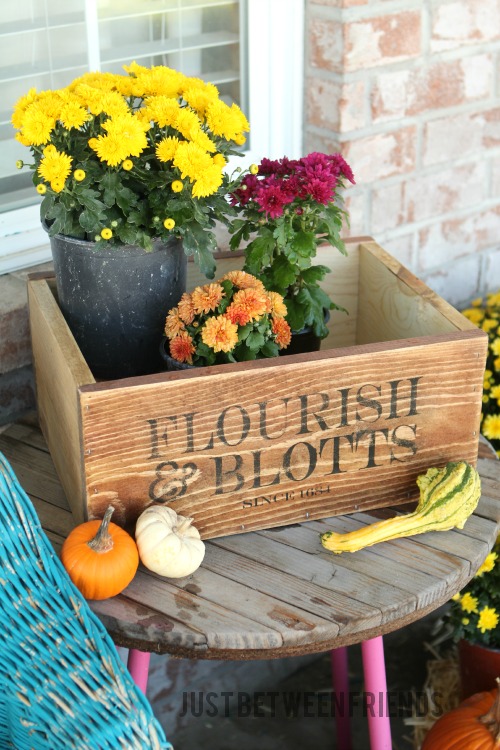
I love the way it looks all together on my porch! Having my porch look like fall is officially checked off of my list of things that I would like to happen before the baby comes. 🙂


So I’m going to forgive you for not making me one while you were at it but only because you’re growing a person, next time I might not be so forgiving 😉