


Mini Chalkboards | Valentines Day Craft
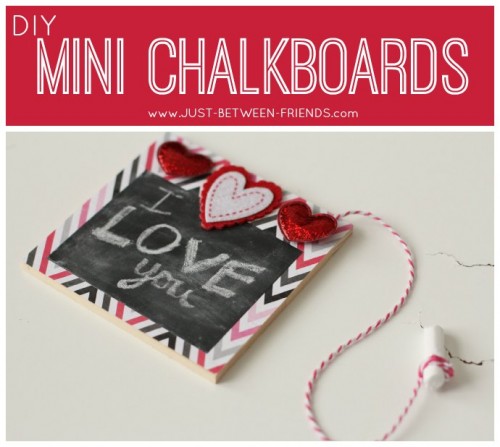
This week, I decided that I would show you some fun ways to celebrate Valentines Day with your kids and thought we would start off with some fun mini chalkboards! The best part about these chalkboards is that they don’t require any sort of fancy power tools or craft machines to make them. Anyone can make these really easily and quickly!

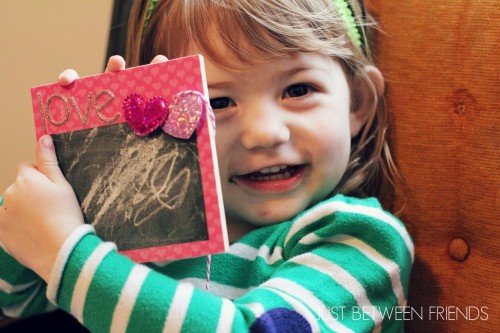
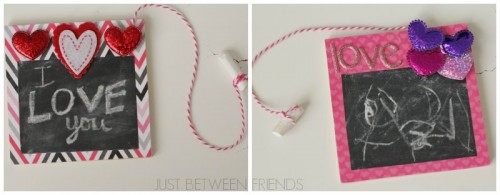
I don’t know about you, but my kids LOVE to have new things to color on. When I showed them these chalkboards, they couldn’t start coloring fast enough! I love that you can customize the look of them to be anything that you want them to be. My oldest daughter thought her chalkboard was lacking something and decided she needed to add two more purple hearts. Now she LOVES it even more because she personalized it to her own tastes. Enough talk though, let’s talk about how easy they are to make!
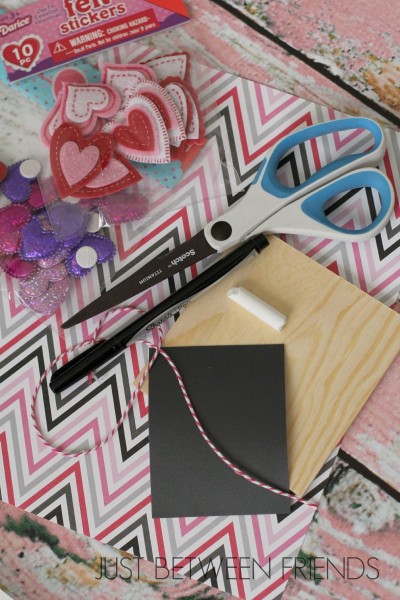
Supplies:
- Heart Stickers-I got mine from the dollar spot at Target.
- Scrapbook paper
- Chalkboard Vinyl (I got mine from Expressions Vinyl)
- Pieces of wood (I found mine in the wood aisle of Hobby Lobby. They are 4.5″x4.5″ and are sold in a pack of two for $1.99
- Bakers Twine (or some other kind of thread or ribbon to hold the chalk)
- Glue
- Chalk
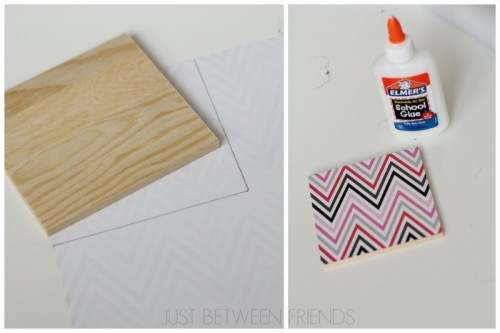
I started by tracing the square of wood onto the back side of my scrapbook paper. That way you don’t have to worry about pencil lines showing up on the front of your craft. Cut out the paper and then use elmers glue around the edges to attach it to the wood. I ran a small line of glue down the sides and then used my finger to make it a thin coat all the way to the edge of the paper so that it would completely seal onto the wood.
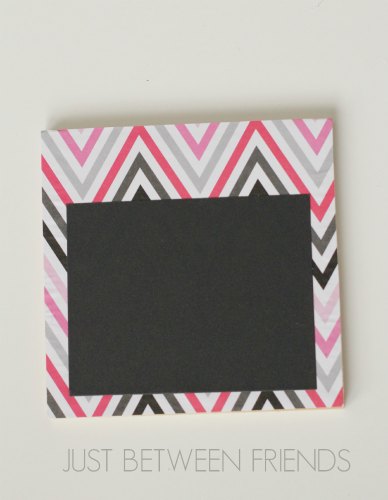
Once your scrapbook paper is in place, you will need to cut out a piece of chalkboard vinyl. You can make it any size that you want that will fit on your piece of wood. I wanted to leave some space for embellishments at the top, and I wanted the scrapbook paper pattern to be seen on the sides so I went with a piece of vinyl that was 3″x3.75″ and it was the perfect size.
Once your vinyl is in place, the real fun begins. Pull out your stickers and attach them however you would like. Then you will tie your string around your piece of chalk and make sure your string is long enough that you will be able to write and have it attached at the same time. I tied a knot around the other end of the bakers twine and then hot glued the knotted end underneath one of the hearts so that it was attached really well and not seen.
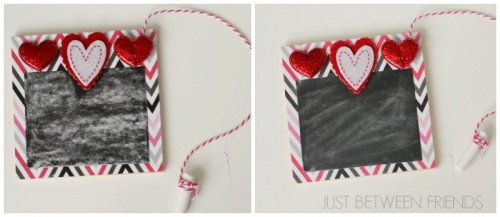
The last step that you will need to do any time that you use chalkboard vinyl is prime the vinyl. Using a piece of chalk, rub it over the entire surface of the vinyl and then wipe it off to prime it. Now it is ready for cute little hands to write to their heart’s content!
What do you think? Would your kids like something like this?

These are adorable – seriously! So creative the kids will love them!
Thank you Pam!
How cute is this? I am so excited for all of you ideas!
Thanks Debra! I hope they all turn out ok! I can’t wait to see what you’ve come up with for next week!
Those are so cute! They would be perfect to entertain the kids while you’re waiting at the doctor’s or anywhere else.
Thanks Leanne!
I love simple activities like this that entertain for hours. Love. Really need to try that chalkboard vinyl!
Heck yes you do! The chalkboard vinyl is the best! you will love it!
How cute are those? My girls would love these!
You should definitely make some! I am thinking they will be awesome at church.
This is ADORABLE!!! I love it
Thanks Kaysi!
I bought everything to make these today. Dax is so excited, except ours will have almost nothing to do with Valentines day since he picked car paper… boys!
How cute! Chalkboard paint would work, too. 🙂
Thanks! I thought about the chalkboard paint, but I think it would have ruined the paper since I put the vinyl on top of the scrapbook paper. Plus the vinyl has nice clean lines. If I were just using the wood, I definitely would have just used the paint. Thanks for the tip!
This mini chalkboard is adorable. You did a great job with it! I just posted a Valentine chalkboard roundup and included it in my post. I hope you can stop by and check it out.
I have attached the link to my post. I hope you have a wonderful week!!
http://www.craftsbycourtney.com/diy-valentine-chalkboard-crafts/
Put the carrots again within the ice field.