


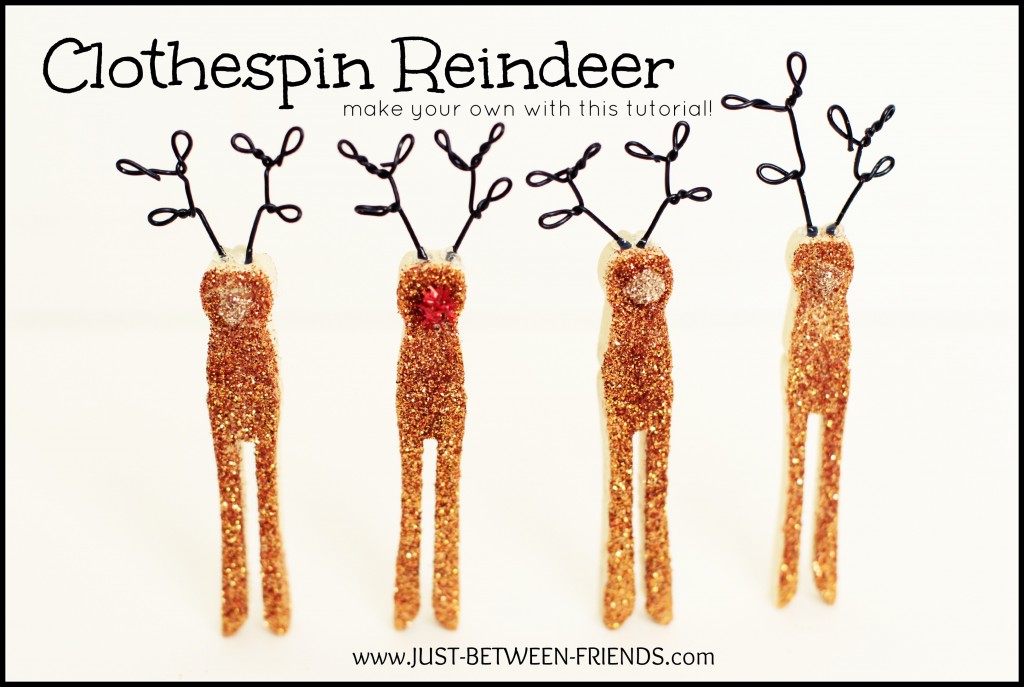
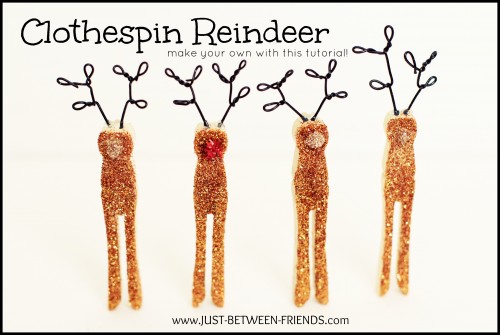
Glittery Clothespin Reindeer #glitteratMichaels
I received Recollections Glitter as part of this paid post. All opinions are my own.
I meant to get these Glittery Clothepin Reindeer up last week as part of the ornament series that I was doing with Holly from Bits of Everything, but life happened and I didn’t get it done. Here it is now, and you can make your own and it’s super easy!
There is just something about glitter that speaks to me. The sparkle and the whimsy that it brings to any project is just too fun. You can imagine my excitement when I was sent a box full of glitter from American Crafts to play with. It was definitely a good day! 🙂 They have all sorts of types of glitter in a range of colors and textures. I used the fine and tinsel textures and am in love! You should probably head over to Michaels and pick up a set of your own. (you can buy it in a set or separately at Michaels with prices starting at $3.99) Let’s get to it!
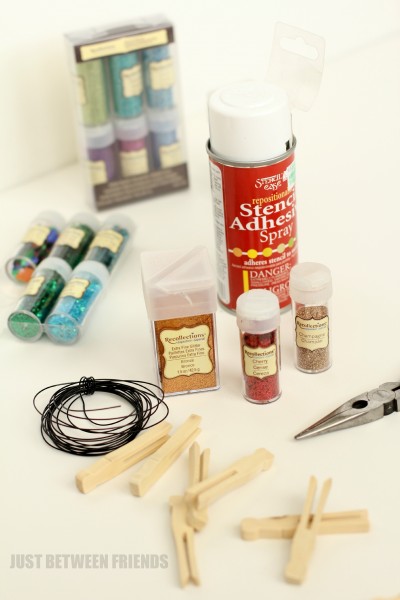
Supplies:
- Recollections Glitter (you can get it at Michaels)
- Mini clothespins- Mine are about 2 inches long.
- Beading Wire- (also available at Michaels)
- Spray adhesive (I had stencil adhesive on hand and it worked great! I picked it up at Hobby Lobby)
- Needle nose pliers
- Hot Glue Gun
- Mod Podge
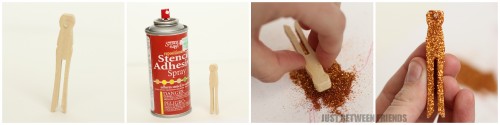
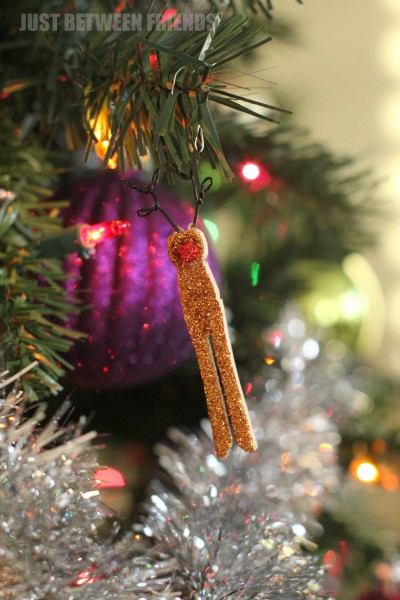
The first thing that you need to do is create a little nose for your reindeer. Use your hot glue gun and put a little round dab of glue at the top of the clothespin to create a nose. I tried various sizes, but I think the bigger noses turned out cuter. Once the glue has dried, spray the front of the clothespin with the adhesive and then dip it into a pile of glitter. I went with the bronze colored glitter for the body. Now it’s time to make the nose a different color! I used a paint brush and a little bit of mod podge and dabbed it onto the nose and then dipped the nose in the different colors. For Rudolph, I used the Cherry glitter. It was SO fun because it is a longer glitter so it really stands out when you apply it to the nose. For “all the other reindeer” (he he, did you see what I did there?) I used a champagne colored glitter.

Now it’s time for the antlers. Using your beading wire, start bending the end and then twist it slightly to create the top of the antlers. Then right below that loop, start another one and make sure to twist as you go. Straighten out the two loops to create a bit of an “L” shape. Next you will make one more loop below those two and twist it so that it sits on the same side as the other loop. Use your pliers to cut the wire and you are ready to attach!
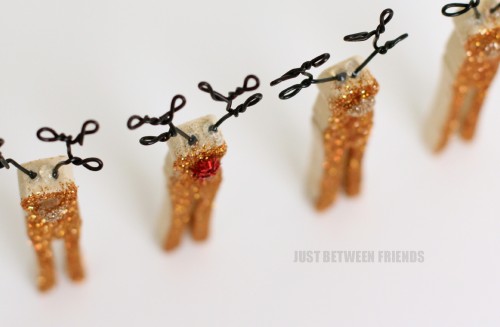
I used hot glue to attach the antlers in place, and it worked perfectly! Now your reindeer are ready to go! you can use them as ornaments by looping an ornament hook through the antler, or you use it as a fun addition to any gift you wrap! However you decide to use them, it will be sure to be extra cute!

So cute! Great craft for the kiddos too!
Adorable!! Love them!
Oh Jonie these are so so cute. I think I need to make some with the nieces! Pined
Oh my goodness, these are too cute. My girls would love to make these. We love glitter!
These are completely darling! Love!
I love how these turned out! So fun!
They are adorable! I love the antlers!
Ohmygosh, these are seriously SO cute! I saw them when you posted but haven’t had a chance to come over – so glad I did, because this is such a darling tutorial. Pinning for SURE! Thanks for sharing!