


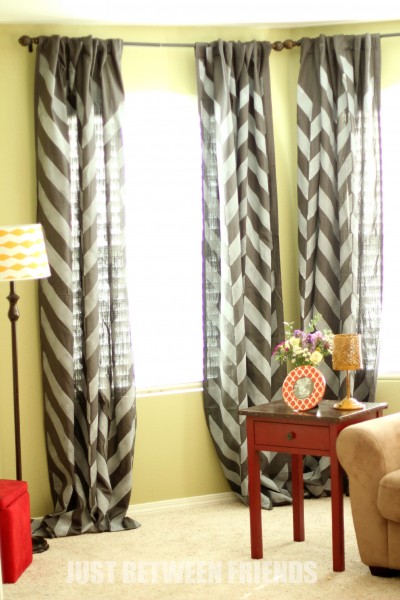
DIY Painted Curtains
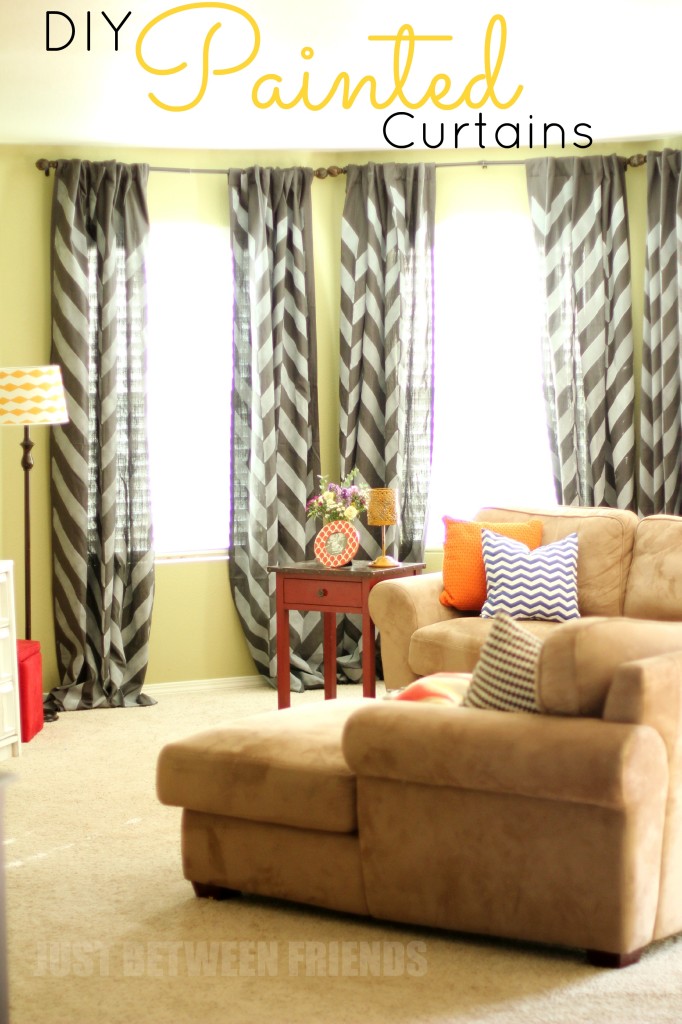
I am so excited to finally share my curtains with you! It has been a VERY long process to get them finished and hung up, but they are done and fabulous!
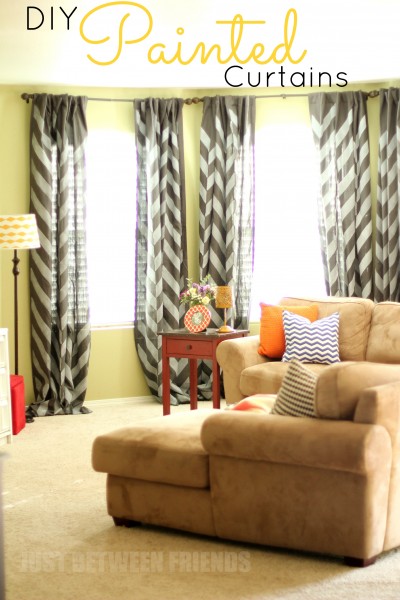
These couldn’t have been done without help from Cutting Edge Stencils who so generously supplied the herringbone stencil for me to try out. If you want to stencil a large area, you will want to purchase a stencil from them! They are incredibly well made and easy to use.
I have lived in my house for 3 1/2 years now, and I have never had any curtains hung up in my family room. Seriously. (I feel like this is a decorators anonymous session. Hello, my name is Jonie and I can’t make up my mind.) My husband originally had these grey curtains hung up at his office, but they moved locations and didn’t need them anymore. They sat in my craft room for a very long time because they were just plain grey and I didn’t love them but knew that I couldn’t just throw away 6 perfectly good curtain panels.
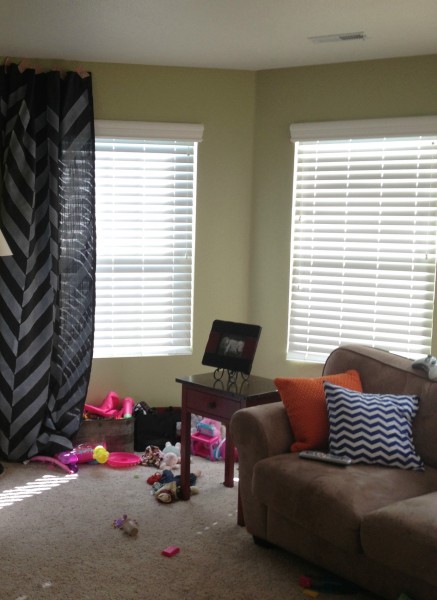
I know I should be better at this, but here is the only “before” picture that I have. It was after I painted one curtain and taped it up to see what it would look like and if I would even like it enough to make 5 more.
One day I had an ah-ha! moment. If I could lighten them up somehow, I bet I would like them. I thought about bleaching them or something, but I knew I would ruin them. Then the idea of a painted pattern came to me and I knew that is what I needed to do.

That is how we got to this point. Long story, I know. But can you blame me? I mean I did go 3 1/2 years without curtains, I better explain my process a little. Also, before we go on, I must warn you. This project is not for the faint of heart. If you mess up on your curtains, there is no fixing it like you could on a wall. You will have to replace the entire curtain. Consider yourself warned.
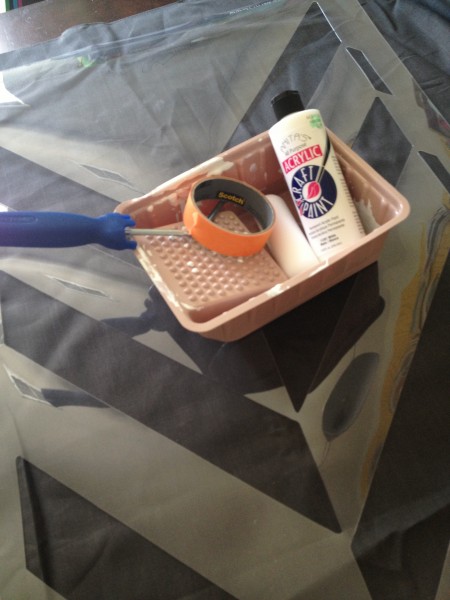
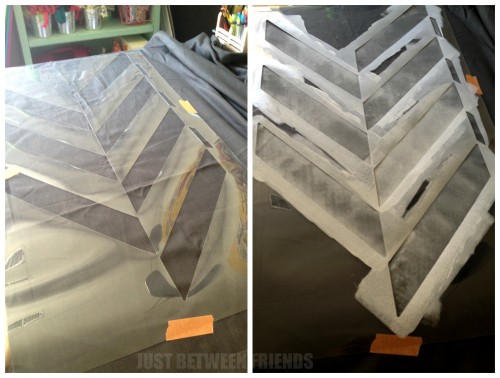
Anyway, here is the readers digest version of how to paint curtains. I bought white acrylic paint from the craft store and watered it down. I wanted it to be able to soak into the fabric instead of just sitting up on the top of the curtain. It also made the paint go further so that I didn’t have to use as much. I used a roller paint brush and pushed firmly to paint inside the stencil. Make sure that you use some sort of painters tape or masking tape to hold the stencil in place while you are painting.
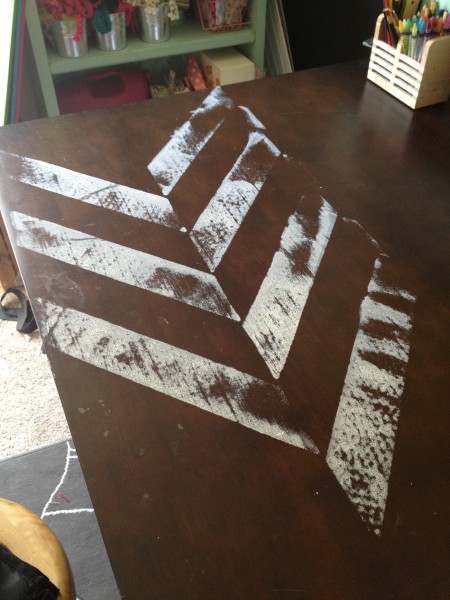
Find a surface that you don’t mind getting paint on. Here is what happens when you start off painting on your table. I switched to using a big piece of white board that I had in my garage.
Basically, paint, pull the stencil off, wipe it off, line it up with the last section you painted and repeat. It isn’t rocket science, but I did learn that it does take a little bit of getting used to.
What do you think? Is this something that you would ever attempt to do?

They turned out awesome, girl!
Thanks Jill!
I would love to try this! How do you get companies to send you products to you? I am new to the blogging world and love all things CREATIVE and would love to get a chance to try some new products out to post about??!!! Thanks!
Email me at joniemarie85@gmail.com and I would love to share with you some tips and tricks that I have used!
These are fabulous, and since you are not faint of heart, you rocked it! Hahah It would take me months to even get the willpower to do it… 🙂
Thanks friend! You could totally do this. For real!
They look great! And hey, we’ve been in our house 4 years…and still have no curtains 🙂
There ain’t no shame in that 🙂
They look great!! I want to know what you did with your table after that happened. Did you just leave it? I’ve never tried a stencil, I need to, but I don’t know that I’d have the patience to do an entire wall or something large like that.
Ha Ha, I actually left the paint on there. Truth be told, since it is acrylic paint, it can come right off. So if I get sick of it, I just have to scrub the table and it would be gone.
Jonie- How many coats did it take?
I only did one coat. It took about an hour and a half per panel if I didn’t get distracted. Hope that helps!
they look great!
Thanks Ashlee!
I don’t know how I missed this post, but oh my gosh those turned out super cute! I have been debating on painting some curtains my self, but am super nervous about it!
I am in love with these! I love how something as simple as hanging curtains can change the entire look of the room. And the decision to lighten them with the white was genius. And let me know when the next decorators anonymous meeting is… I should probably be there. ;0)
So pretty!! Love them!
These are so awesome! They look so professional and fabulous!
Oh my gosh Jonie these are absolutely gorgeous!
I love them I have been wanting to paint curtains for my room, I have the stencil, I have the curtains and I just havent done it yet thanks for the motivation.
Hey, I’m interested in painting my curtains for my living. I have some chocolate brown sheers could I paint them since their sheer panels?
These curtains are great! I would love to spruce up a pair I already have with some paint and stencils.