


Polka Dot Table Runner
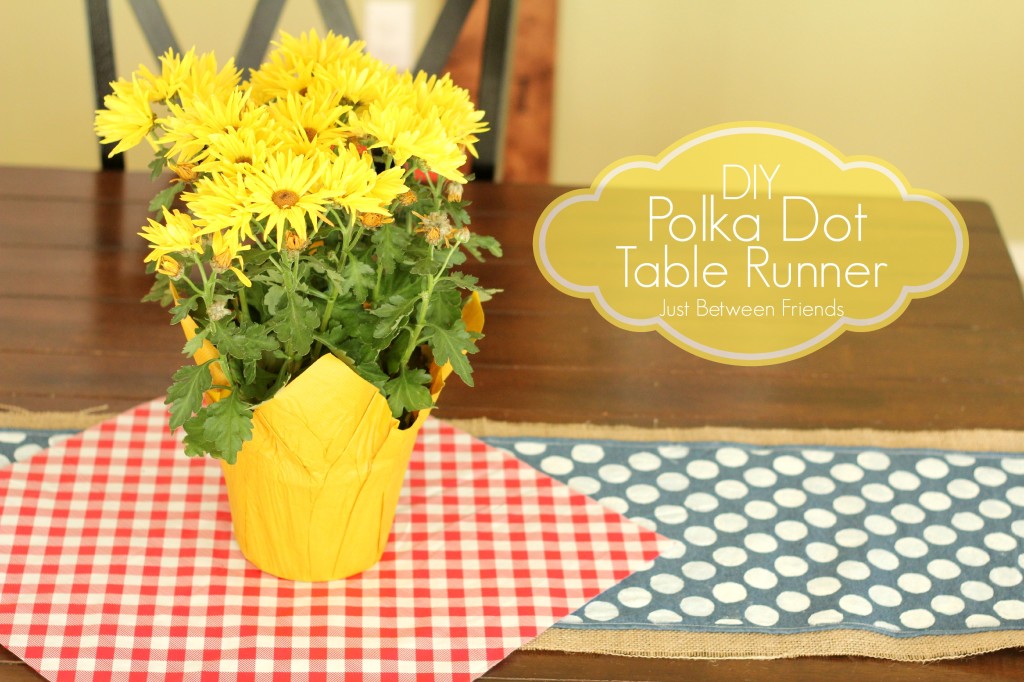

It’s day three of our Summer Party Series, and today I am going to show you an easy way to make your table look great at the party. We used this polka dot table runner on our party table, but since I don’t want to spoil the way it all looks put together, I am going to show you how I use it on my kitchen table now. It is the perfect summer runner and since it is so neutral, it can be used for any time of the year really.
Let’s get started. You will need burlap and denim fabric. I bought the fabric at Hobby Lobby and had them cut a piece of each that was 3/8 yard. This seemed like the perfect width for the runner. When I got it home, I simply cut the burlap so that it was straight without taking off width, and the length was already perfect plus it was nice that the ends were finished which means is won’t fray at the top and bottom.
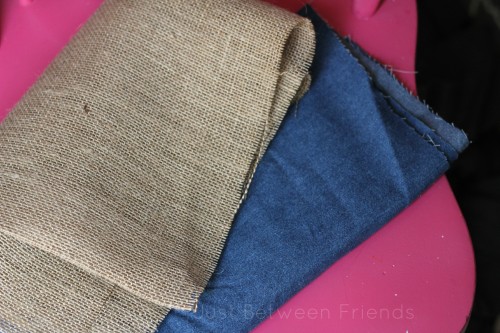
The denim I cut off about two inches and then turned the edges under and sewed it all the way around. After the denim was finished, I pinned it onto the burlap and simply sewed all the way around making sure that my stitch hit right where I had just finished sewing. It resulted in a nice clean border.
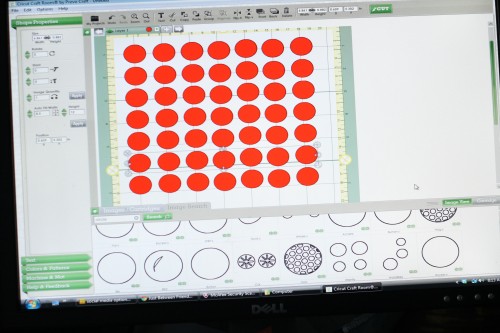
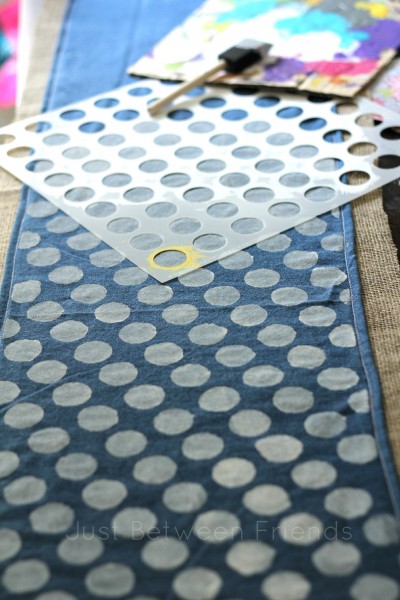
After it was put together, I pulled out my handy dandy cricut machine and made a quick polka dot stencil. The dots measure about an inch big. The thing that makes designing the stencil go the quickest is if you finish designing one line of circles using Cricut Craft Room and then highlight all of the circles and copy and paste them. Then the rows will all be the exact same. Do that over and over until you have the amount of rows that you would like to have.
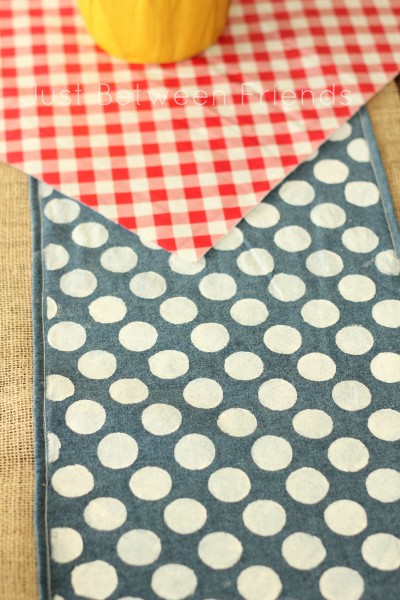
Once it was cut out, I turned it on it’s side so that the polka dots were diagonal on my runner. I think it looks better that way. I used a sponge brush and white acrylic paint and dotted away. Be sure not to use too much paint or else it will bleed under the stencil and make the lines not as crisp.
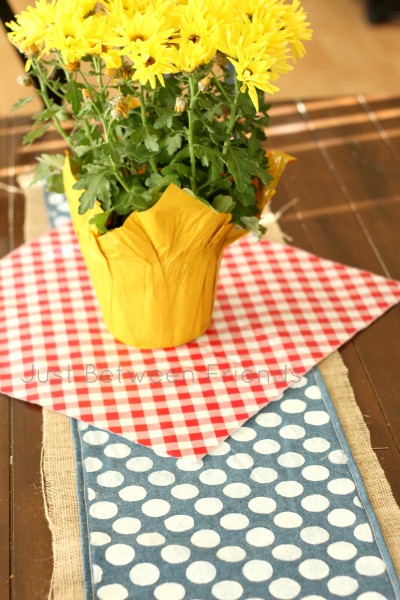
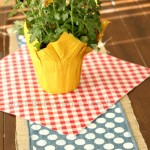
Once it dries, you are done! I told ya, easy peasy! I decided to layer it with a piece of the red gingham table cloth fabric from Hobby Lobby. It is actually a vinyl fabric, so it can be wiped easily and doesn’t fray. All I needed to do was cut a square and I was done! I love it because #1 I love the layered look, and #2 I don’t have to worry about my flowers ruining my runner with water.
What do you think? Now, you need to go over to Jesseca’s site and check out the delicious parmesan fries she made for our party. They were amazing! Seriously. You need to make them tonight.


You are darling. Love this idea!
love how that turned out Jonie!
Jonie – this is so cute! Love the polka dots!