


DIY Window Sills

Our windows don’t have window sills. Well, they do, but they are just covered in the texture of our walls and peel everytime they get wet or someone rubs against the edge. They definitely aren’t very pretty. I decided to add some MDF and see what would happen, and it turns out it looks SO much better! Let me show you what I did.

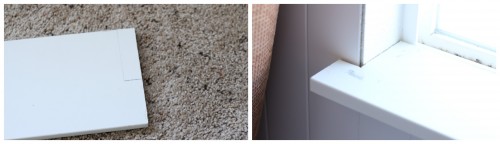
I began with a 1″x6″x6′ and a 1″x4″x6′ piece of mdf. I also used a jigsaw, hammer and nails for this. I wanted the ledge to overhang on the sides and I wanted the smaller piece underneath to be shorter then the top piece.
The window sill was 70.5 inches long and 3 inches wide and my wood was about 73 inches by 5.5 inches. I measured so that the sides would be overhanging the same and then cut out a notch on each side so that the wood would fit right inside the sill. I used nails to hold it in place. (2 inch thin finishing nails work perfectly for this)
Next, I cut my smaller board to be 70″ long and nailed it underneath the ledge. It doesn’t take a ton of nails to put these pieces on, and remember that you will have to fill all of the holes that you create. Less is better, just make sure it’s sturdy.
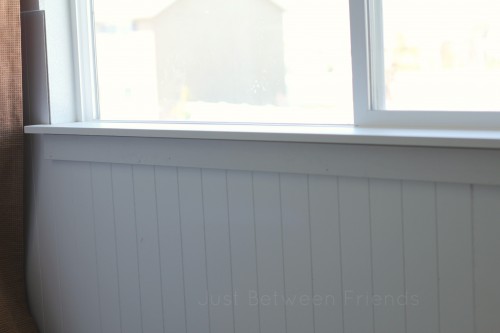
You will need to sand the edges of the window sill to give it a finished look. I like having rounded edges on the sides. Then fill all holes, caulk all seams, and paint it. It is good to use a glossy paint when painting trim. It is a lot easier to clean and it gives it a really nice look.
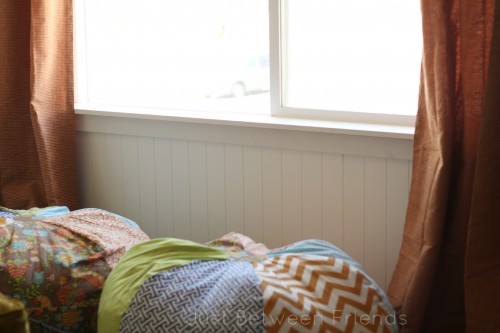
Step back and enjoy the view! All you hard work has paid off! It really is such an easy addition that makes a HUGE difference.
*Post Edit* You can click to find the tutorial for the DIY Bean Bags that are in front of the window.

Love the finished look of this! We need to do this in our house for sure.
xoxo,
Amy
p.s.- thanks for the heads up on the typo- glad to have it fixed. 😉
Thanks Amy, I am really excited by how easy it was to do and how nice it looks after. Plus it is totally affordable which is huge for me.
ps-I was glad to help. It gave me a chuckle 🙂
I found your blog though Organize and Decorate Everything. I love your window touch up…such a big difference! Do you have a tutorial for those awesome pillows in the last picture? I’m in love…
Emily
Thanks for stopping by, and thank you for the compliment. I just so happen to have the tutorial for the bean bags, so you’re in luck! 🙂 You can find how I made mine by visiting this post http://justjonie.com/2012/11/diy-beanbags.html If you make some too, send me a link! I would love to see how they turn out!